kp.crimea.ua
A handmade rat toy is an original element of interior decor, an interesting souvenir for relatives and friends, a little friend for a child. There are many options on how to make a beautiful craft. Patterns of mice and rats can be found on the Internet. In accordance with your own vision, details can be reduced or increased. For example, you can sew a rat with your own hands, which will be the size of a sofa cushion, or create a small mouse that fits in the palm of your hand. The sewing process itself is interesting and creative. The master himself decides what elements to add, how to decorate the craft and what to dress the rat in.
How to sew a rat with your own hands - pattern, description of sewing a Zorro rat
The mask and cloak of Zorro are famous thanks to the film of the same name, which has attracted the attention of many viewers around the world. Let's try to dress up a mouse in a similar outfit to create an original craft. To work you will need:
- Grey, brown, pink materials.The optimal fabric for crafts is felt. It is elastic, does not crumble, so working with it is quite easy.
- A small piece of green fabric for a mask and cloak.
- Gray silk threads.
- Pink wool threads.
A fabric rat pattern consists of several elements:
- The main part is the torso.
- Abdomen – 1.
- Ears – 2.
- Lower legs – 2.
- Upper legs – 2.
- Cloak – 1.
- Mask of Zorro – 1.
The pattern is printed on a printer, after which the parts are cut out and transferred to felt. Further work is carried out in stages:
- We sew the body parts together on the wrong side. The seam starts at the head of the craft. When it reaches the neck, we sew in the belly.
- We weave a braid from yarn - this will be a ponytail, so the length is arbitrary, at the request of the master.
- The connecting seam ends at the bottom. Leave a gap for the tail. We sew it in using the same seam as the body.
- We stuff the mouse. It is best to use felt. Sew up the gap for stuffing.
- Let's move on to the ears. We put the pink parts in the shell and sew the toys onto the head. For the eyes we use beads or paint.
- It's time for the front and back legs - we sew them on last.
- We put a cloak with a collar cut out of green felt on the craft, and sew on a mask. Rat super hero is finished!
How to sew a rat - do-it-yourself rat patterns from felt

kp.crimea.ua
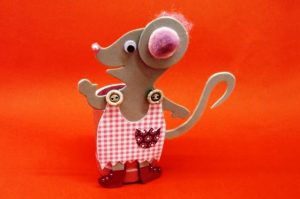
Another original way to make a stylish, funny mouse will require the following set of tools:
- Beads – 2 pieces.
- Ribbon - length depends on the size of the mouse. This is the future ponytail.
- Stuffing material.
- Gray, pink, black felt - one thin sheet each.
Let's start sewing the toy:
- The rat pattern is redrawn from paper onto fabric. The main part consists of two parts.
- We cut out the ears on gray or black material, the inside will be pink. We glue two parts for each ear, fold them in half vertically, forming a fold in the center. Sew the mice onto the head.
- We apply the tail ribbon to one of the body elements. We sew the two main parts on the wrong side. The tail is sewn with a single stitch along with the connecting seam. Leave a gap for filling the toy.
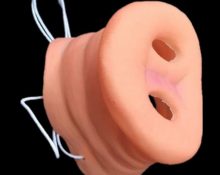
- We stuff the rat with stuffing and sew it up. Glue on the eyes and embroider the nose with thread. This completes the work. The technique for creating the craft is as simple as possible, and the mouse turns out cute and original!
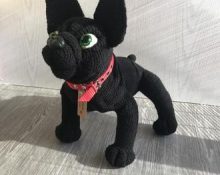
Sew a rat with your own hands - pattern for old lady Shapoklyak’s denim rat
Everyone remembers the old lady’s favorite Shapoklyak from the cartoon about Cheburashka and the crocodile Gena. You can easily make it yourself from tired jeans or shorts. To work you will need:
- A piece of red material is the toy’s hat;
- Black beads - 2 pieces for the eyes;
- Small pieces of plush - 2 pieces for the eyes;
- Beige pompom – 1 for the nose;
- Rope with beads - around the rat’s neck;
- Filling material;
- Denim from old jeans.
To sew a Shapoklyak mouse, we proceed according to the following scheme:
- We cut out two parts of the body - left and right.
- Separately draw the base and tail. The length of the tail is determined individually.
- We cut out two identical parts for the ears. We stuff them with padding polyester and sew them along the outer edge. The distance from the edge is five millimeters.
- We sew the body of the product, then sew it to the base.
- We stuff the toy using padding polyester, foam rubber or felt.
- Sew up the gap for stuffing.
- Sew on the ears and a pompom on the nose.We make the eyes from plush pieces of fabric, then glue black beads onto them as pupils.
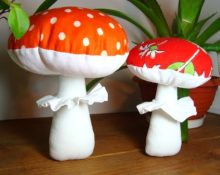
- We cut out a semicircular part from red material and sew it in the shape of a cone. This is a mouse's hat. We sew it on the head. The beautiful mouse is ready!
 0
0