creativecommons.org
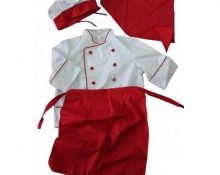
Both adults and children are familiar with elves. Adults find it interesting to create a doll DIY elfto decorate the interior or Christmas tree. For kids, this is a favorite toy that is associated with magic and fairy tales. Often an elf costume is required for various holidays, matinees and performances. This mysterious, diverse character becomes the main character of many productions.
How to sew an elf with your own hands - do-it-yourself elf dolls
In order to get a beautiful decorative elf doll, you will need to stock up on:
- Transparent fabric, such as tulle;
- Needle and strong thread;
- Doll face paints;
- Scissors - regular or curly;
- Thick lace or thread;
- Various fabrics. It is better to give preference to thin material;
- Wooden balls of different sizes. These will be the arms, legs and head of the toy.
The size of the balls is not important; the larger it is, the larger the doll. The head detail should be slightly larger than the arms and legs.Using paint on the head, draw a face, then leave it to dry. You can move on to the dress:
- You will need white and colored fabric. We cut the material into strips of approximately 5x30 centimeters. These are the skirt details.
- To make a bow you need a small piece of canvas - 4x5 centimeters.
- We shorten the lace, ribbon or braid for tying to twelve centimeters.
- We fold the strips of fabric in thirds and iron them, sewing the skirt in a circle.
- Pin the right side of the white material to the back of the colored fabric on the skirt. The multi-colored part protrudes seven millimeters above the white material.
- You can turn this part inside out and bend it, and then make a basting. Tighten it tightly and fix it.
- The dolls' faces should be dry, and you can start working on the hairstyle.
- We insert the ends of the tape into the ball. We pass the material for the bow into the loop and tighten it.
- Between the ribbon we put laces about twenty centimeters long - these are the arms and legs of the doll. We tie strong knots.
- We thread the legs into the skirt and make a strong seam. You can stitch it on a machine, but it’s easier to work with a small doll by hand.
- We put balls on our arms and legs and secure them with knots.
- You can sew on ears - each ear is made from wire and fabric according to its own pattern, depending on the size of the doll. With the help of bright hair from laces you can turn the elf into a real magical image. You'll also need wings.
How to make an elf with your own hands - useful tips
creativecommons.org
To make elf wings, you need to draw a shape on paper and think about the size. Then you will need thin decorative wire to create a frame according to the sketch. To attach the wings to the back, you need to twist the ends of the wire to create a small tail. The wings with wire veins, which are also attached to the tail, look beautiful.This completes the work with the frame.
To create the wings themselves, it is better to use blue chiffon and green organza. These fabrics are most suitable for the image of an elf. You will need an iron to join the materials. Ironing delicate fabrics need to through dense material. We lay out the blue canvas, then the frame of the wings, and on top the thinnest adhesive film - a spider web. All uhthen cover it with organza. Iron the entire layerAnd together with a hot iron. Do not use the iron while doing this. Place it, press it down and put it away. We cut out the outline of the wings, retreating from the wire by three millimeters. The product is ready. It can be decorated with sparkles, rhinestones and other decorations. Making luxurious elf wings with your own hands turned out to be not at all difficult!
 0
0