creativecommons.org
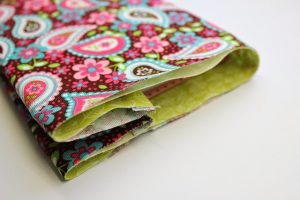
All books are gradually deteriorating. Dust settles on them, moisture gets in, and the sun affects them. School textbooks and student literature are the first to suffer. At risk are cookbooks that are often used while cooking. Therefore, a fabric book cover is an irreplaceable thing. It will give the publication a unique, beautiful look and protect it from external influences. The cover of a regular book is rarely found on sale. Only plastic, transparent options that all look the same. A DIY book cover made of fabric is an exclusive product. Anyone can create it, the book will look non-standard and fashionable. It's a great idea to make several identical covers for your collected works. And different covers will help your child distinguish textbooks from each other.
How to make a book cover from fabric - DIY book cover
Creating a masterpiece is a creative process that requires preparation.Before you make a book cover with your own hands, you need to choose two materials - for the outside and inside of the product. The work will require four pins, a needle, fabric-colored thread, and scissors. You can use a sewing machine or sew by hand. Step-by-step instructions on how to sew a book cover:
- We prepare two pieces of material. Cut out rectangles of the same size. To calculate the smaller side, measure the height of the book, add two centimeters for the allowance on each side, five millimeters for the loose fit. For a long edge, multiply the width by half, add thickness, two centimeters for the allowance and ten centimeters for the lapels.
- Place the rectangles right sides together. We sew the blanks along the short edges a centimeter from the end of the material. We turn the material inside out, fold the wrong sides, and iron it.
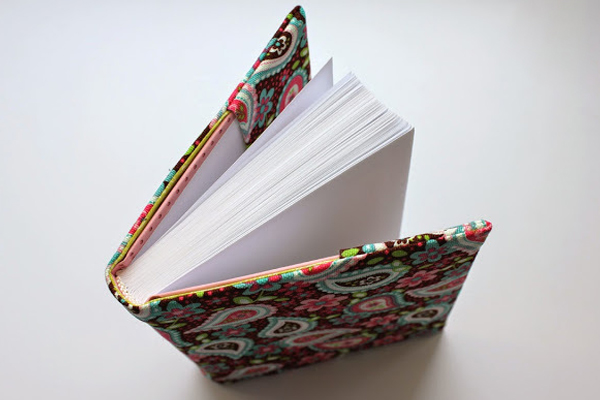
- We try the product on the book and insert it into the cover. We check the endpapers, they must be identical in length. We fix a pin in each corner. We remove the product and turn it inside out.
- We sew the long sides a centimeter from the edge. On either side we skip five centimeters to turn the fabric inside out. A zigzag stitch at the very edge will help strengthen the cover. We turn it inside out through the gap left, straighten the corners and go over it with an iron.
How to make a soft cover for a book - sew a book cover yourself
creativecommons.org
The soft cover is pleasant to the touch, beautiful and unusual. You can also do it yourself. To make a stylish cover, we will need two types of cotton in pretty colors - for the lining and front side, and material for the padding. The best padding comes from fleece.We separately select cotton material for processing edges and patterns. A braid or ribbon is suitable for a bookmark. For fastening - one button.
- The lining and facing fabrics are laid out and two rectangles are cut out. They should be one centimeter wider than the book on all sides. We take into account two folds of seven centimeters per book cover on each short side.
- The rectangle is also cut from fleece, a printed material. On the left and right sides it is a centimeter shorter than the fabric flaps.
- The lining and outer material are folded facing each other, sewn together on the right and left sides. The product is turned inside out and ironed. Then the fleece is inserted.
- It is laid half a centimeter from the edge on the right and left sides. At this distance we make seams. We try on the product for the book, remove excess parts of the fabric with scissors. At the top and bottom, the length of the cover should be one centimeter longer than the book.
- All layers are stitched from the bottom and top edges. To create a binding effect, you can sew a seam in the middle.
- The cover is ready, all that remains is to decorate the cover. You can make a thematic application for a school textbook. For example, on a biology textbook you can depict the sun and a flower. We cut out a flower from the fabric, a circle for the sun and a small circle for the middle of the flower. Sew the flower to the center. Be sure to leave half a centimeter for hems.
- We iron all the hems, select the location of the patterns, and fix them with pins. Using a hidden seam we secure the applique.
- We make a bookmark from the ribbon. We attach it to the product, after trying it on a book.
- An additional decoration will be piping along the top and bottom edges. Cut out 2 strips of material. Width - three centimeters. Length: two centimeters longer than the cover.To get bias tape, we go over it with an iron.
- The binding should be sewn from the inside at the top and bottom, having first inserted the bookmark braid.
- We choose a place where to sew a button. All that remains is to make a loop. We take a strip of fabric, iron it like bias tape, stitch it and fold it to your liking. Another fastener option is ropes, ribbon, button.
How to sew a book cover from fabric - sew a book cover with handles
We will consider another option for making a beautiful book cover with your own hands below. The difference is that the case has handles. This makes it convenient to carry the book with you at all times. To work you will need:
- Front, lining material.
- A bit of non-woven fabric.
- Velcro, threads.
- Sewing machine, scissors.
- Needle.
- Decorative elements, stripes to taste.
How to make a bookcase with handles:
- We cut out three identical rectangles - one from each material. The height is four centimeters greater than the height of the book, the width is twelve centimeters. A closed book is measured. The curl and spine size are taken into account on both sides.
- From three materials we cut out one element per flap fastener. Any form. We sew Velcro onto the lining of the fastener.
- Place the two parts of the fastener – the outer part and the lining – with their right sides facing each other. We sew on all sides.
- We fold the rectangles in the same way and stitch along all edges. We iron both parts along the seams without touching the Velcro. We remove the stitching to turn the product inside out.
- We try on the cover, if it fits, we mark the places where the folds will be sewn. Sew on the second Velcro, sew on the finished flap.
- We pin down the folds and then sew them along the entire edge of the product. We connect the handles with the clasp and the cover.
 0
0