touchthebeauty.com.ua
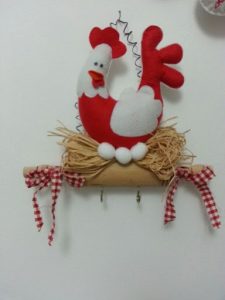
A do-it-yourself felt rooster will be an excellent holiday gift for a child or relatives. The souvenir looks bright and colorful, and making it is not at all difficult. The advantage of felt is its non-woven composition. Consequently, it does not crumble or unravel during operation. Felt is easy to work with - cutting, sewing, making a pattern. Even a child can sew a felt rooster with a little help from their parents. Sometimes the threads and needle are replaced with glue, further simplifying the task. There are many options for sewing a toy, and a pattern for a felt rooster can be found on the Internet.
Felt cockerel - pattern and cutting
You can make a beautiful cockerel made of felt with your own hands only if you have a pattern. In addition, you will need the following tool:
- Knitting threads or beads to make eyes. It is advisable to choose black color, so they will look natural.
- Filler for stuffing.
- Simple pencils and soap - draw on light and dark materials.
- Scissors for cutting fabric and cutting out parts.
- Needle and thread.
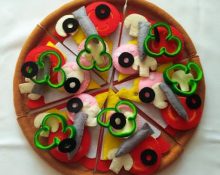
- There are two types of felt - a thick sheet of red and yellow and a thin sheet of blue, green, orange, red and yellow.
An alternative way to make a toy pattern is to take a simple children's coloring book. The figure has clear contours and does not have overly complex elements. All details must be numbered. Print out the coloring book in two copies. From one you need to cut out all the parts with numbers. Using the second pattern we will check whether the toy matches the sample. It is worth considering the plasticity of felt. When sewn by hand, it may become slightly deformed, so it is better to sew with a sample. Master class on how to make a toy pattern:
- Take thick red material. Cut out the comb, paws, and top tail feather.
- Take the yellow material. Trace the outline of the beak, leaving an allowance. Cut out.
- For the second feather, take thin yellow felt. Make two copies taking into account the mirror image. Leave seam allowances along the inner edge of the product.
- We leave the remaining two on paper. They do not need to be cut together. Make them into a double piece of green fabric. Leave allowances along the bottom edge.
- Cut an identical double element from orange fabric, cut it and make two parts of the tail, mirrored. Below are seam allowances.
- Use green material to make two parts of the neck, mirrored to each other. Here we make allowances at the top. Set aside the green fabric - it is no longer used.
- From thin red felt we make mirrored elements of the beard, leaving no allowances.
- We do the same with the wings - two mirrored parts without allowance.
- The head and belly are made of blue material. We make two elements for the head and for the stomach.
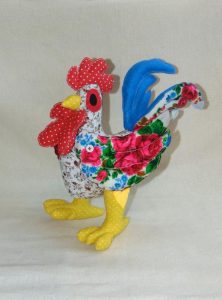
The cockerel is cut out of felt.All that remains is to arrange the parts and fill it with padding polyester.
DIY felt rooster - patterns and sewing
crafta.ua
To sew a toy you will need:
- Glue gun;
- Several colors of felt;
- Golden thread;
- Some beads;
- Lace;
- Padding;
- Threads of various colors;
- Outline for golden-colored material;
- Scissors;
- Needle and marker.
Using a glue gun, we connect the feathers on the tail to the wings. You can stitch it with a needle. Now you need to sew the body and decorate the neck with beads around the circumference. Sew the wings and decorate in the same way. Connect the wings, stuff with padding polyester. Next you need:
- Sew the body parts. The seam begins at the neck, all elements of the bird's head are sewn in.
- Mark the location of the eyes and thread the thread from the inside of the toy.
- The rooster is stuffed from felt, several strings are made through it, then the eyes are sewn on.
- Bring the thread near the comb, make a knot and hide it inside.
- We finally sew up the body along the edges, insert the paws and tail.
- We sew the wings to the body and fill the toy.
- We paint the beak and legs along the contour with gold paint so that they do not fluff up.
The cockerel is ready, let the outline dry for a while and you can send the toy as a gift.
 0
0