The Dachshund pillow, the pattern of which is as simple as possible, will be a great friend for children and adults. This cute craft looks great in a modern interior. It can be used for decorative purposes and taken with you on trips and long trips. A fabric toy dachshund pattern can easily be found on the Internet. There are many options for how to sew a dog. It may consist of one part or include several elements at once. You can choose materials for sewing to suit your taste. Any fillers can be used to fill the toy. Tilda Dachshund, the pattern of which is a little more complicated, will be a wonderful gift for friends and relatives for the holiday. A toy dachshund made independently is safe for health, so it can become a baby’s favorite from the first days of life. In this article we will look at several options for sewing various products for all occasions.
Sew a dachshund with your own hands - pillow patterns, master class
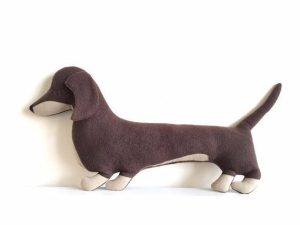
To make traveling on a plane, car or bus comfortable, you can sew a dachshund in just a few hours; the pattern and instructions are presented below. This craft is practical. This is a convenient travel pillow option. To work you will need:
- Dark marker.
- Paper.
- A needle and several pins.
- Filler.
- Scissors, threads of a suitable color.
- Material: two multi-colored strips of forty centimeters each.
To make a beautiful dachshund with your own hands, the patterns can be adjusted in size using special computer programs. Next, you need to draw the main details of the dog on a piece of paper. Travel pillows are designed to protect the neck from strain, which is why they are shaped like a semicircle. The dachshund dog pattern will be shaped like the letter C, turned ninety degrees. We also draw the nose and ears.
When using knitted fabrics, keep in mind that the material will stretch when the pillowcase is filled with filler.
How to sew a dachshund with your own hands:
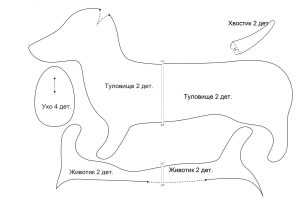
- Cut out a pattern from paper. We fold the black material in two layers, attach the sample to it and transfer it with a marker. We get two fragments for the nose, ears and torso.
- We cut it out of the fabric taking into account the allowances - no more than a centimeter allowance.
- Fold white fabric in two layers. From it we will make legs - 4 fragments, a tail - 1, and ears - 2 pieces.
- We make the dog's ears two-colored. Let's move on to stitching paired elements. We leave gaps in the places where the paws and tail are sewn in.
- We stuff the paws with filler and insert them into the unstitched areas. Sew the body of the dachshund.
- To turn the craft inside out, use the gap left under the dog’s tail. Carefully stuff the body of the pillow. Sew on the tail.
- We divide the paw part into two parts, pulling it in the center with thread.Attach the ears to the head of the pillow. They should be loosely packed. The black side is on top.
The tilde dachshund is made by analogy; the life-size pattern is made using a computer. The elements are stuffed and stitched together. You can simplify the task by not making paws or leaving the dog without a tail.
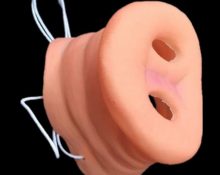
Dachshund fabric pattern - muzzle pillow
This DIY fabric dachshund can be round or square. To work, you need a ready-made pillow, small pieces of multi-colored material for parts, and the main fabric of the pillowcase. Accessories that will come in handy include a couple of buttons, stiff threads or mustache fishing line, and a sewing kit. We will get a dachshund, the pattern of which is built on the basis of the finished pillow. Instructions on how to sew a dachshund:
- We measure the diameter if the analogue pillow is round.
- For a rectangular product, you need to measure the sides.
- We select the appropriate size for the eyes, tongue, eyebrows, nose.
- We make all the details of the muzzle from fabrics of different colors. Here you can fantasize, choosing the expression of your eyes, the size of your nose, etc.
- We lay them out around the perimeter of the pillow, fix them and attach them.
- We sew the tongue on only one side so that it can dangle freely. We lay the seam from the inside.
- We pre-treat the edges of the tongue if the fabric is loose or may begin to unravel.
- We cut out two triangles from material of different colors and sew them together. These will be the dog's ears.
- The pillowcase can be collected. Sew the front part to the back side, sewing in the ears in parallel. Leave room for stuffing.
- We fill the muzzle with padding polyester, cotton wool or pieces of fabric. Sew up the hole.
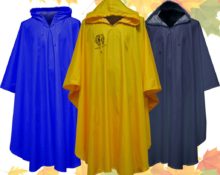
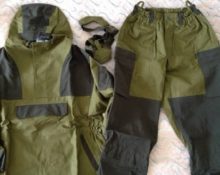
This DIY dachshund toy will be an excellent decorative element.Considering that all the parts of the muzzle are made of fabric, you can sleep on it without fear of getting scratched on the buttons of your eyes or nose. This is a great idea for a children's room or living room. A jacket for a dachshund is also easy to sew; the pattern consists of only a few fragments.
How to sew a dachshund with your own hands - patterns, photos
Tilda Dachshund, like an ordinary toy in the shape of a dog, will surely appeal to a child. When sewing a toy for a baby, experts recommend putting a little mint or motherwort in a bag and sewing it into the craft. This will contribute to the baby's sound and restful sleep. A homemade toy will be a wonderful companion for a child. It is made from natural materials, so parents can safely give it to their baby from the first months of life.
To sew a puppy you will need:
- Soft material - a rectangular piece of forty by fifty centimeters. Suitable flannel, flannel and knitted fabrics, felt.
- A piece of black leather or velvet - five centimeters by two and a half centimeters.
- Sintepon or cotton wool.
- Scissors, pins, needle, thread.
- Felt pen.
The dachshund toy pattern is drawn on plain paper. We draw the body and ears of the toy, cut it out and attach it to the material. From the fabric you need to make four fragments for the ears and two for the body. Further sequence:
- We fold the parts of the body with the wrong sides and sew them together, leaving a gap for filling the puppy with padding polyester.
- We turn the product inside out and carefully fill it with stuffing. Afterwards we carefully sew the body up to the end.
- We connect the ear fragments along the wrong side. Leave a small gap to fill them with padding polyester. We turn the ears inside out, fill them, and sew them onto the dog’s head.
- We embroider eyes and eyelashes with black thread, and sew on a leather or velvet nose.
- We make imitation claws on the paws using thread.
This completes the process of working on the craft. The child will be delighted with his new friend. This is also a great gift idea. The work will take no more than a few hours.
 0
0