creativecommons.org
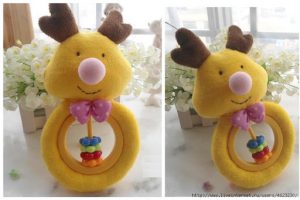
When a child appears in a family, the question often arises - how to make rattles with your own hands? The design of most toys for children is extremely simple, which is why homemade products are in demand among parents. There are several reasons - not every children's toy bought in a store is made from safe or natural materials. The abundance of Chinese goods for children is strikingly bright, but most of them cannot be called high quality. Besides, if you have time to make your own rattle, why spend a hefty amount of money on buying one. Variety and safety are important for a baby, so there is no point in expensive rattles. A DIY rattle is a great option for a gift for a godson or nephew. Many homemade toys are more beautiful and more interesting for the baby than store-bought plastic.
How to make a rattle - DIY rattle for kindergarten
A DIY rattle for kindergarten is a craft that most parents make. A child should have a favorite thing in kindergarten that will belong only to him. Let's look at two types of interesting toys that you can make at home. The first option is a ringing ring. To do it, you need:
- Stock up on multi-colored ribbons, an awl and a ring at a fabric store. The size of the ring depends on the age of the child and the size of the hand.
- Buy special bells with clothespins at the fishing store.
- Using an awl, make small holes in the ring. The distance between them is small. Use the tip of a pair of scissors to widen these holes.
- Make six pieces of ribbons of different colors and unfasten the base of the bells.
- The bell has a hole at the top. You need to thread ribbons into it, and then thread them into the holes on the ring.
- All that remains is to tie the ribbons into bows, and the bright toy for the kindergarten is ready.
The second option is a little more complicated. You will need basic knitting skills. The toy is called “Octopus”, but you can make it any plant, animal or insect. The doll is based on a Kinder Surprise box and a plastic egg. In addition, you need to find small balls - 6 pieces. These will be the legs of the octopus. We will make the eyes from buttons. You should prepare the filler, cotton yarn, thread and needle in advance. You can use peas, buckwheat, and beads as filler. We put it in a Kinder box and balls, after which we need to close the containers tightly. Further:
- You need to start knitting with three loops, then move in the round. You can change the color scheme - it all depends on what kind of toy is planned. All knots must be hidden inside.
- Constantly trying on knitting to the egg will avoid sizing errors.
- At the point where the egg narrows, the number of loops is reduced. But the canvas is not completely connected - you will need to insert a container with cereal or other filler into it.
- We sew buttons in place of the eyes, put the product on the Kinder, and sew it at the bottom.
- We tie the balls in the same way. They can be made monochromatic or multi-colored.
- Based on the same principle as the work on the cover for the container, canvases for balls are created. The difference lies in the need to secure the legs to the body using a loop chain.
How to make a rattle out of paper - DIY rattle toys
creativecommons.org
Babies' favorite paper toy is the dancer. Even the smallest babies will love this rattle. They have developmental properties. The baby understands that if you touch a part, the rest begin to move. According to psychologists, dancers are able to promote the development of coordination of movements in the first months of a baby’s life. Our great-grandfathers made dancers from wood. Nowadays, cardboard or thick paper is more often used. To make your own paper doll, you will need:
- Glue stick.
- Nylon threads of good strength.
- Four meters of rope or cord.
- Awl, scissors.
- Stationery knife.
- Whatman paper or other paper.
- A sheet of good cardboard.
You can find models of any animal on the Internet. First you need to study the template and choose the best option. Then you can get to work. We print out a picture of the future toy. For this we use thick paper. We lay out the printout on cardboard and secure it with glue. Using a stationery knife, cut out each element. We collect the dancer:
- The legs are hidden behind the main part and pierced with an awl where they will be attached.
- A rope is threaded through the holes and tied on the sides with voluminous knots. The paws are fixed on the body. The knots are not very tight - the elements should move freely.
- We connect the moving parts at the back with a strong nylon thread. You need to wrap it carefully with a rope and just let it go. Tie a knot at the end of the rope.
- We make small cardboard circles. Two will be enough. We glue them to the rope. Now, when the circles are twitched, the animal will move its paws.
DIY rattle bracelet - DIY rattles for newborns
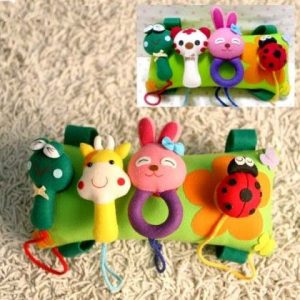
All parents know that from the first days of life, the baby must move actively - lie on his stomach, play in the playpen, roll over, etc. A bracelet with a rattle perfectly stimulates a child's mobility even in infancy. It can be attached to a child's arm or leg. Bracelets are sold in stores selling children's goods and are in great demand. But if you have time and desire, it’s easier to make a toy yourself. To do this you need:
- Bells. They can be found at any sewing store.
- Rattles. These could be containers with cereals or beads.
- Thread, sewing machine or needle.
- A small piece of cotton material.
- Velcro.
To make the bracelet dense, it is better to make it three-layer. Otherwise, the weight of the bells will crush the toy. We take cotton, fold it three times and sew the edge. If the child is between two and five months old and is well-fed, a bracelet length of eighteen centimeters is suitable. We sew Velcro onto the fabric from the inside. On the outside we attach bells, cereal balls, and bells. Here the choice is up to the master.
DIY wooden rattle
Children's wooden toys have a number of advantages. They are not hazardous to health and can last for many years due to the strength of the material. In Russia, for a long time, wooden rattles were considered traditional entertainment for babies. What you will need to make your own rattle at home:
- Markers and brushes.
- The paper is self-adhesive.
- Several rubber bands, a hacksaw.
- Special glue for wood.
- Several wooden beads and bells.
- A stain or paint that can be used for toys.
- Meter of elastic cord.
- Sandpaper.
- Wooden dowel.
The amount of materials depends on the size of the toy. When everything is ready for your DIY baby rattle, you can get to work. We act step by step:
- We cut each dowel into twelve centimeter segments. Take a marker and draw a centimeter straight line at each end of the dowel. The plane of the lines must coincide.
- An incision is made along all the lines that are drawn at the ends of the material. For this, a hacksaw or saw is used, but of a small size.
- We round the edges and sand the workpieces in the places of cuts.
- We paint the sticks in different colors using safe paint.
- We put the tree together, forming it into a coordinate plane. We cross the green stick with the blue one, then put the red one crosswise on the blue one and so on. To keep the structure in place, tie rubber bands tightly at the intersection point.
- Thread is threaded through slits made at the ends of the tree. It should be as dense and reliable as possible. We string wooden beads and bells onto a thread.
- Checking the location of the dowels. If they hold their shape, you can fasten the product with glue.Each cut where the lace is located is filled with glue and dried thoroughly. Afterwards we cut off the rubber bands and the product is ready.


 0
0
