Many people are interested in the name of the ball with snow inside and whether it is possible to make it with your own hands.
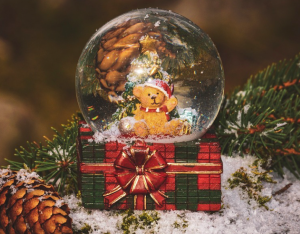
This Christmas souvenir is called a “Snow globe” and is a glass ball with artificial snow, which, when shaken, begins to fall onto a miniature figurine.
The history of such crafts goes back centuries. Such a ball first appeared in the 16th century. But then it was a vessel filled with water in which various birds swam.
The first officially recognized snow globe was presented in 1878 at an exhibition in Paris. Inside was a small figurine of a man with an open umbrella. In 1889, at the same exhibition, a snow ball was presented, inside of which there was a small Eiffel Tower. The ball was still filled with water, and sand and porcelain chips were used as snowflakes.
Soon the popularity of this souvenir began to grow at a frantic pace.And in the 20s of the 20th century, the snow ball became directly associated with the Christmas holidays.
Nowadays, there is no limit to the variety of snow souvenirs. They have special rotation mechanisms built into them, thanks to which the snow moves without shaking; make music boxes; equip them with lights. In large shopping centers, large vinyl balloons are installed, which are inflated for the holidays and create a magical fairy-tale atmosphere.
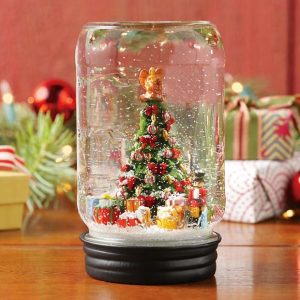
Today we will look at how to make a snow ball with your own hands.
How to make a snow globe with your own hands
Making a snow globe with your own hands is quite simple.
What you need to prepare:
- First of all - a jar. Various jars with tight-fitting lids and a volume of up to 1 liter may be suitable. You can use plastic balls for making crafts, jars of creams and cosmetics, old glasses and shot glasses.
- Small figures. You can buy ready-made ones, you can borrow them from Kinder surprises, take them from construction sets, use miniature Christmas tree decorations, pieces of plastic plants, etc.
A small laminated photo will look unforgettable.
The only condition is that everything you use to fill the jar must be artificial. Do not use live spruce branches and cones: they will get wet and the liquid will become cloudy.
- To fill the container, use pharmaceutical glycerin. It should occupy no less than 1/3 of the total volume of the jar. The more glycerin, the more viscous the liquid will be, and the slower the snowflakes will fall.
- The second component is distilled water. If it is not available, boiled or still water from bottles. You need to take 2/3 of the total volume of the jar. The water from the tap is no good, it becomes cloudy and suffocates.
- Snow - you can use crushed eggshells, white beads, artificial snow.
- Glitter is the smallest silver-colored sparkles.
- Glue gun or super glue.
How to make a snow globe. Master Class
Let's look at a step-by-step master class on making a snow globe:
- Take the lid and turn it over with the inside facing up. You can glue another lid of a slightly smaller diameter inside it, which will serve as a small pedestal for the figurine. Take the gold one - it will fit better into the decoration.
- Using glue, glue the figures to the pedestal.
- Pour snow into a jar. How to make a glitter ball? Yes, just add them to the jar.
- Fill with water - 2/3 of the total volume.
- Add glycerin - 1/3. Add gradually, stirring constantly.
- We glue the neck of the jar.
- Screw on the lid with decoration.
- After the glue has dried, turn the jar over and your Christmas souvenir is ready!
If desired, you can make a higher stand for our ball. This will make him look more presentable.
Roll several cardboard strips along the diameter of the lid, fasten them, and cover them with self-adhesive gold film or foil. Decorate as your imagination dictates - with pine branches, braid or ribbons.
From the article you learned what a snow ball is, what it is called and how you can make it yourself.
You are convinced that this is a simple task and even inexperienced craftswomen can do it.
 0
0