creativecommons.org
DIY New Year's topiaries, photos of which can be found on the Internet on various sites, will be an excellent interior decoration on New Year's Eve. According to some beliefs, this tree brings happiness and prosperity to the house. The master class will help even beginners in the field of needlework to make New Year's topiaries on their own. Beautiful, exclusive trees look original and non-standard. There are many ways to create Christmas decorations. You can use fruits, candies, paper, fabric and much more as the main material. New Year's topiaries look great on a windowsill, on a fireplace, in a sideboard or on a bedside table. This tree has long symbolized the Christmas mood and reminds us of the approaching New Year.
DIY New Year's topiary - master class, photo, what the craft consists of
To create a New Year's topiary with your own hands, you need to familiarize yourself with the main components of the craft. The decorative element includes five parts:
- The base is made of lightweight spherical material. It is convenient to use foam balls for this.
- New Year's topiary is installed in a pot. Gypsum is poured into it, the barrel of the product is inserted until the gypsum hardens. Exclusive decor is created using rhinestones, cones, pebbles, sparkles and other decorations. An important criterion for a pot is stability. A handmade product should not wobble; you will need a pot of the appropriate size.
- To make the crown, various available materials are used. For example, it was fashionable to make DIY New Year’s topiaries for 2021 from thread or coins. Christmas balls, coffee beans and much more are also used.
- When creating a trunk, a wire is used on which fabric is wound. To make your own New Year’s topiary as close to natural as possible, you can use a tree branch of the required thickness.
- The designer chooses additional decorative elements independently.
Do-it-yourself round New Year's topiary for beginners - what to make the base from
creativecommons.org
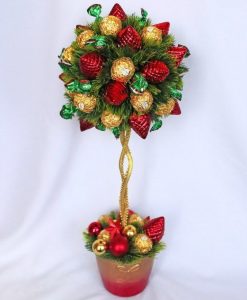
You can make New Year's topiaries in various shapes with your own hands. Round trees and Christmas tree-shaped crafts look the most impressive. The base of the round product can be made from the following materials:
- Old newspaper, balloon and PVA glue. We tear the paper into miniature pieces, fill them with PVA, and leave to soak for a while. The resulting mixture is applied to the balloon. We wait until the mixture becomes hard and pierce the ball with a needle. Similarly, you can make a round shape from threads. We also soak them in glue and wrap them around the ball. The result is a stylish ball with spaces between the threads.
- Polyurethane foam.We take a container in the shape of a ball, for example, a lampshade. Pour foam into it and leave it to harden. Then, using a utility knife, we remove the base for the tree, adjust the shape, and remove excess material.
- Foam plastic. The master class tells in detail how to make a New Year's topiary out of polystyrene foam yourself. You can buy raw materials in specialized stores. A spherical figure is cut out using a knife. There are two tricks to working with polystyrene foam. Firstly, it should be cut extremely carefully so that the base does not crumble. Secondly, you need to use a special glue that will not corrode the foam.
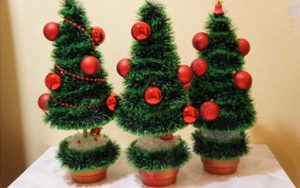
New Year's topiary - a house, how to make a tree in the shape of a Christmas tree
The product consists of three parts - base, crown and trunk. The crown can be made using a stationery knife, blade, and glue. The material used for the Christmas tree is a cardboard layout, plain paper, polystyrene foam, and felt. The external decoration of the crown is of great importance.
The easiest option to make a barrel is to use wire. It becomes the axis around which ribbons, fabric strips, tinsel, thread or other materials are wound. With a real knot the product will look more natural. The base for the Christmas tree in three stages:
- We select a pot in which the cone will look original. Various containers used on the farm are often used as a pot - bowls, glasses, glasses, toy buckets, etc. Much depends on the size of the tree.
- We fill the container with raw materials that will hold the craft. Gypsum filling is considered the most suitable, since gypsum is moisture resistant.
- We decorate the base.You can decorate the pot with a large scarlet bow made of satin ribbon or paste it over with fir branches of various sizes.
Original DIY New Year's topiary - master class on making a tree from fabric
The master class on how to make a New Year's topiary from fabric is quite simple. You can do crafts with your child at home. Progress:
- We choose a dense material that can retain its shape. Experienced craftsmen prefer felt. Alternatively, you can use a thin fabric such as voile or organza.
- We make the base and trunk of the tree. We make a paper cone from thick cardboard. Cover it with burlap, felt or other fabric. You can do without a paper layout. Shape the felt into a cone and glue the edges together with a glue gun.
- We fix the fabric cone on the top of the trunk with glue.
- We attach beads to felt, imitating Christmas balls. Sprinkle the tree with large glitter and glue on the rain.
- Spray the product with hairspray to fix the glitter.
As a result, we get an exclusive do-it-yourself topiary for the New Year, a photo of which can be posted on the Internet, on forums of needlewomen and craftsmen.
DIY New Year's topiary, step-by-step instructions on how to make a New Year's topiary from tangerines
Many fashion magazines suggest making winter topiary from tangerines. The tree spreads a delightful, festive aroma throughout the room, creating a Christmas atmosphere. To work you need:
- Several small tangerines;
- Gray yarn - one skein;
- A special washcloth used in floristry;
- Thin wire;
- Flower pot;
- Glitter glue for decorating the pot;
- Artificial snow. Can be replaced with salt or sugar;
- A natural branch of medium thickness is the trunk of the craft;
- Several spruce branches.
Progress:
- We make the base for the tree from a floral sponge. The type of base is chosen by the master. The crown is made in the shape of a cone or ball.
- We wrap the tangerines with gray thread to hide the wire holders.
- We wrap the fruits with wire crosswise. We make thick ends from the ponytails, winding them together. We thread the tails into the sponge.
- We decorate the free areas on the tree with spruce branches dipped in PVA and sprinkled with artificial snow, salt or sugar.
- We insert the second part of the floral sponge into the pot and insert the stem.
- Cover the surface of the pot with glitter glue.
- We insert several spruce branches near the base.


 0
0