prom.ua
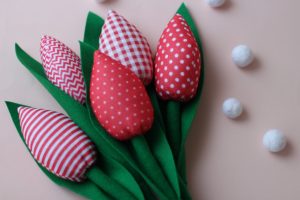
The tulip is a flower that most people associate with spring, the first warm days and the traditional holiday of all women - March 8th. Living flowers, unfortunately, tend to fade quickly. After a while there are no memories left of the gift. But a homemade tulip will be preserved for a long time and will decorate the room all year round. Sewing such a craft will not be difficult even for a novice craftsman. The process will certainly interest the child. He will be able to independently cut out the parts, glue them together, choose a color and form an elegant bouquet.
Many mothers were faced with the need to sew a tulip costume with their own hands for a matinee or a child’s performance in kindergarten or in elementary school. Usually such performances are organized in the spring to congratulate mothers and all women on their day. Making a decorative tulip is much easier than making a costume. It will take just a little time and perseverance to get an original flower.
What you need to sew tulips yourself - prepare the materials
The most convenient and easy-to-work material is felt. The fabric does not need edge processing, does not require special care, and is elastic and soft. To sew a tulip you should prepare:
- A sheet of paper, a simple pencil and a black or blue pen;
- Scissors, needle, pink, white and green threads;
- Bamboo sticks;
- A sheet of thick green felt;
- Soft white and pink felt.
The work is done manually. In some places, the stitching can be replaced with glue. It is also important to prepare a pattern. It consists of three parts - a stem, a petal and a leaf. We draw these fragments on paper and cut them out to transfer them to fabric. To make one flower, you need two parts of a leaf, one part of a stem, and two fragments of a bud.
How to sew a tulip with your own hands - master class
crafta.ua
- We transfer the leaf to the green material twice.
- Once on the green felt, trace and cut out a strip for the stem.
- Cut out the bud twice on the pink fabric.
- The bud is made of soft material to make it easier to turn out.
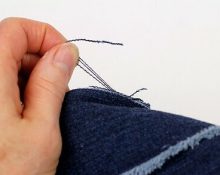
- We work with the stem. We wrap the bamboo stick with a strip of green felt and sew along the length. The stem is also sewn at the bottom, otherwise the stick will fall out of the fabric.
- We work with the bud. We sew two pink fragments along the edges, leaving a gap at the bottom. Turn the bud right side out and straighten it. We add volume using filler - padding polyester or holofiber. You should stuff the product as tightly as possible to the very top. A crochet hook, stick or simple pencil will be an excellent assistant.
- We put a bud on the finished stem stick. The stem should go completely through the flower, resting on the very top.
- Use pink thread to make a seam along the bottom of the bud, tie the thread to a knot at the end so that the seam does not unravel.
- We tighten the thread as tightly as possible around the stem and tie a knot again.
- To finally sew the bud to the base, we use a blind stitch.
- The fabric that will remain at the base of the flower should be hidden inside when sewing.
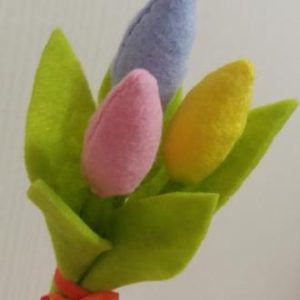
- All that remains is to decorate the product with leaves. Wrap a sheet of thick felt around the stem stick. The upper part remains free; only the base of the leaf is adjacent to the stem. Sew the leaf with small stitches.
- Decorate the product with a second leaf. Place it slightly lower than the first sheet. We sew in the same way.
The felt tulip is ready!
 0
0