creativecommons.org
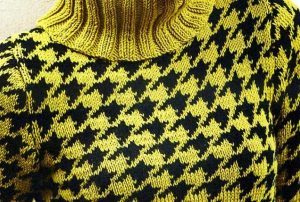
Fashion designers first used the chicken foot pattern at the beginning of the nineteenth century. It was then that things of this coloring came into fashion in Scotland. They were mainly worn by diplomats and politicians. They called it code neutral. Soon black and white colors became an indispensable element of the image in secular society.
Many people are interested in why the design is called “chicken feet” to this day. The reason lies in the special shape of the cells. Visually, they have long been compared to the front fangs of a dog or the paw prints of geese. This pattern can be achieved by cross-weaving black and white threads. Moreover, a special cross weaving is used. As a result, the craftsmen receive a light, smooth fabric, which is decorated with an abstract cage.
The cute pattern is still popular today. However, fashion designers have improved the colors significantly. In addition to black and white, they use all possible shades.The cage can be made in any size, which allows you to experiment with fashionable looks. A goose foot can also be made using regular knitting needles at home. Moreover, the technique is not at all complicated; no special diagrams or patterns are needed.
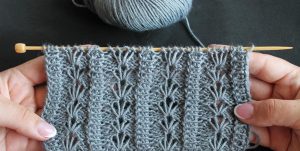
Knitted chicken feet pattern - diagram and description
creativecommons.org
Let's look at how to make a sample of a prestigious ornament. First you need to cast on a number of loops that will be a multiple of six. Then a couple of edge loops. We perform all the rows of the sample step by step:
- White. One loop is removed and five knit stitches are made.
- White. Purl five stitches, one is removed, the thread remains in front, as in the first row.
- Black. Five front elements, one is removed, the thread goes back.
- Black. One loop is removed, the thread goes forward, five purl loops are made.
- White. Three loops are removed, the thread is back, and one knit stitch is made. One element is removed, the thread goes to work, another front one.
- White. Purl, then one is removed, the thread is in front of the work. We make a purl, remove three, the thread remains in front.
- Black. Knit - three, remove one, thread back, knit two.
- Black. We start with two purls, remove one, move the thread forward, and finish with three purls.
- White. Two knit stitches, one removable, thread behind, three knit stitches.
- White. Purl - three, remove - one, thread - forward, purl - two.
- Black. Three front loops, remove three, thread back.
- Black. We remove three, the thread is in front, three purl loops.
As you continue knitting, the pattern is repeated from the first step. This is a standard pattern. A skirt or set made of this material will look impressive.
Knitted chicken foot pattern, inclined
The slanted chicken foot is also often used by modern designers. This is an improved technique for creating an ornament. It is characterized by increased density. Winter warm clothes are sewn from this material - sweaters, jackets, trousers and other products. The repeat here includes three loops and two edge loops. Progress:
- We make the first and second rows from facial loops;
- On the third row, the right knitting needle simultaneously threads 3 loops, knitting is knitted. In this case, the loops are not removed from the knitting needle. Yarn over and knit through three stitches;
- We start the fourth row with two purl loops. We skip one, and initially knit the second loop with a purl loop. The first loop is knitted in the same way. Both are reset. We make one purl until the row ends. At the end - two purl stitches.
Then we start from the first step. We carry out the diagram until we get the desired size of the canvas.


 0
0