creativecommons.org
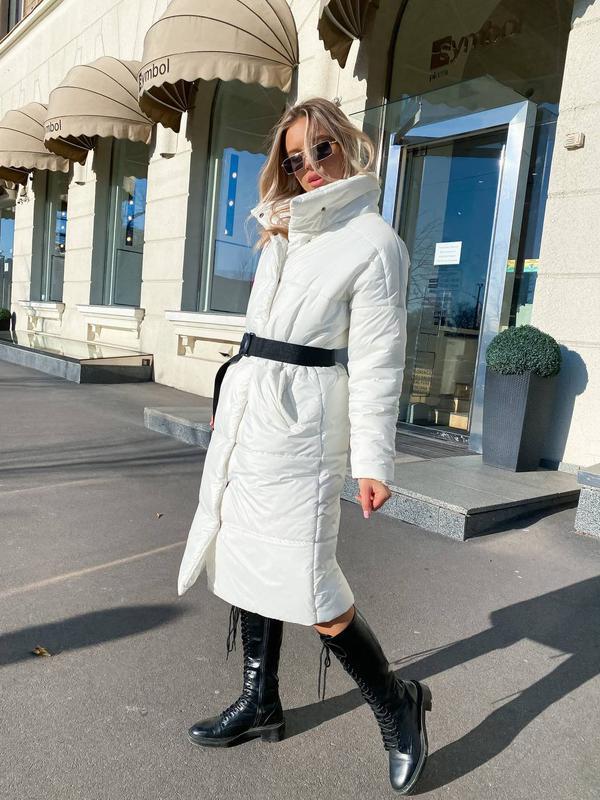
A stand-up collar is one of the most stylish clothing elements that adds rigor to any look. In this material we will tell the history of the collar, and also show how to properly build a turn-down collar with a cut-off stand for a coat. At the end of the article you will find photographs with the most successful examples of stand-up collars.
History of the collar
The collar appeared quite a long time ago: the first prototypes of modern collars appeared during the times of Ancient Egypt. These were wide pieces of fabric decorated with embroidery, inserts of precious stones and processed glass. Such a collar could be afforded by the pharaoh, the rich nobility and the high priests. The Egyptian collar was wide and covered not only part of the neck, but also the shoulders and even part of the chest. In addition to the obvious function, collars in Ancient Egypt also demonstrated the status of their owner.Thus, the military had to have stripes on one side of the wide collar confirming their high rank.
The first collars, reminiscent of modern ones, appeared in the Middle Ages, and were small pieces of fabric. The first images of stand-up collars that have come down to us date back to the 13th century. Initially, they were part of the costumes of French and Spanish aristocrats and were sewn on separately, but later the fashion for stand-up collars spread throughout Europe.
In parallel with this, crowberries appeared on the territory of Rus' and were called barma. Outwardly, these collars vaguely resembled the wide collars of noble nobles of ancient Egypt: they were just as wide, covered the shoulders, were worn over the main outfit and were richly decorated with embroidery and semi-precious stones. In Rus', princes and their entourage could afford barmas. Later, stand-up collars appeared, which were borrowed from European patterns.
In parallel with this, the Renaissance era began in Europe, and not only the rich classes could afford crowberries. Collars made of velvet and brocade, edged with fur, came into fashion. In Spain, rigid stand-up collars made from tulle and guipure have become popular. Such collars were often decorated with lace and ruffles. This type of stand-up collar entered fashion history as the “Mary Stuart collar” in honor of the Queen of Scots, who loved these collars and often posed in them for official portraits. Over time, the French adopted the "Stewart collar" and modified it by making it longer and adding ruffles. Such collars looked somewhat exaggerated, but the fashion for wide collars continued for a long time.
In the 16th century, the stand-up collar was replaced by the cutter collar, which was famous for its inconvenience. This corrugated collar was so hard and uncomfortable that it was called the “parricide”, because it was almost impossible to turn your head. Despite negative reviews and complaints, the “freza collar” was worn by almost all nobles and wealthy merchants. With the advent of fashion for wigs, stand-up collars “blown out” and began to cover the shoulders and became longer in the front. If in the 16th century collars had a round shape, then in the 17th century pointed ends and rectangular edges came into fashion. It was this form of collar that became popular in Russia, where Peter I began to forcefully introduce dresses of European cut.
Stand-up collars made a comeback in the 18th century. And again this happened in England, where a similar cut of a stand-up collar became mandatory for tailcoats and coats. Since then, in the UK, the men's stand-up collar has remained virtually unchanged, in contrast to the cut of clothing and its shades. The same cut of the coat with a stand-up collar carried over into the 20th century with minor changes. Today, stand-up coat collars are divided into vertically standing collars and stand-up collars, where the stand-up collar is detachable.
What you need to create a stand-up collar
A stand-up collar is often used when cutting coats for practical reasons, as it protects against wind and cold.
To sew a collar we will need:
- A pattern built according to the parameters of the model.
- A piece of fabric to match the coat.
- Sewing supplies (threads matching the color, tailor's chalk, needle).
Step-by-step process of patterning a stand-up collar
creativecommons.org
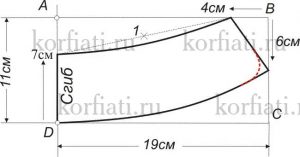
Stand-up collars are also divided into several types depending on the construction of the pattern.This is how they make: one-piece collars, combined and sewn into the neck. Today we will analyze the last option. A classic stand-up collar consists of two parts: the upper part of the collar and the so-called collar. The height of the stand depends on the density of the fabric and the presence of lining.
- Using ready-made patterns, build a collar consisting of two parts and transfer it to the fabric, guided by the position of the grain thread.
- Leave a 1 cm margin on each edge.
- Reinforce the upper part of the collar with non-woven fabric.
- Fold the collar right sides inward and sew the outline with a machine stitch, observing the indentation. Leave about 10 cm unstitched at the bottom of the part.
- Turn out the collar.
- Sew the top and bottom of the collar.
- Using a hidden seam, sew the collar into the already prepared armhole of the coat.


 0
0