Does your child show interest in knitting? Or maybe you yourself want to master this exciting activity? Then you have come to the right place. You will need a pair of knitting needles, a ball of thread, a little attention and patience.
First steps in knitting
If you find an interesting model of knitted clothing on the Internet, which is accompanied by diagrams, it is not enough to know what each stick, triangle or other “squiggle” in it means. First, you should “get to know” the basics.
Preparatory stage
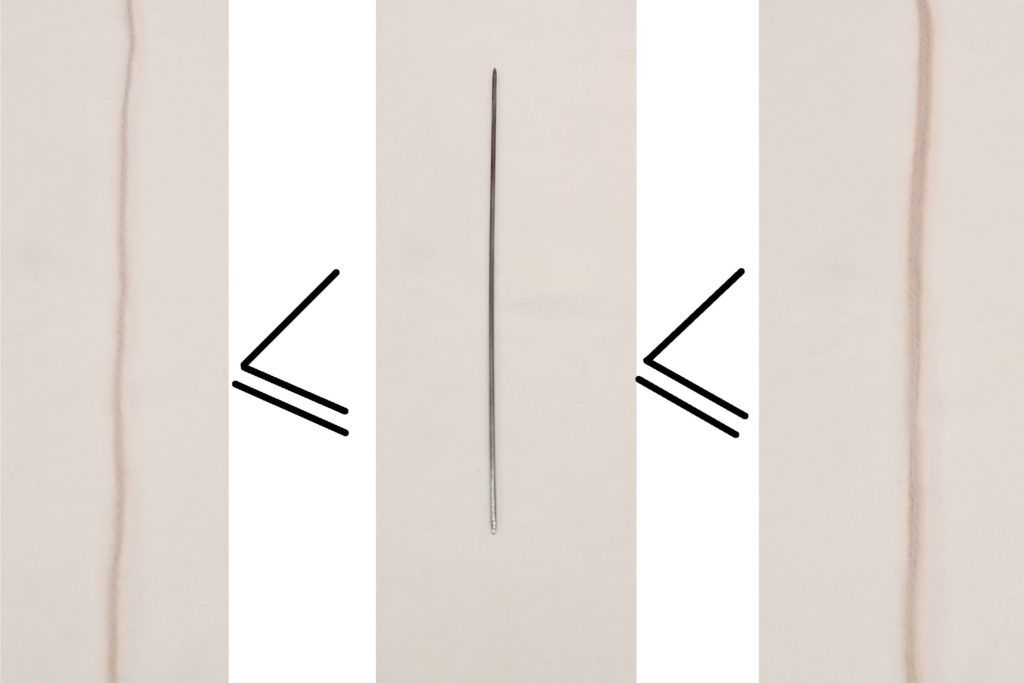
In order for the knitting process to proceed comfortably, and for the pattern to be even and beautiful, it is important to choose the right yarn and knitting needles. The thickness of the knitting needles should be no less than the thickness of the thread, but not more than it, folded in half.
@textile-en.techinfus.com
If the knitting needles are much thicker than the yarn, the fabric will be very loose. If, on the contrary, it is too tight, and knitting will turn from pleasure into torture.
Set of loops
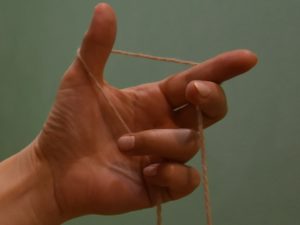
Sit comfortably, place a ball of thread in front of you on the left, and two knitting needles on the right (to begin with, it will be more convenient to use straight short ones, with which you knit socks).Unwind one end of the yarn, about a meter long. Step back 25-30 cm from the edge (for 20 loops). Raise your left hand with your palm facing you. Wrap the thread clockwise from left to right between your thumb and index finger. In this case, fix the free end that will be in front (but not tightly) with your little finger, and the one that goes to the ball - between the 2nd and 3rd or 3rd and 4th fingers.
@textile-en.techinfus.com
Then:
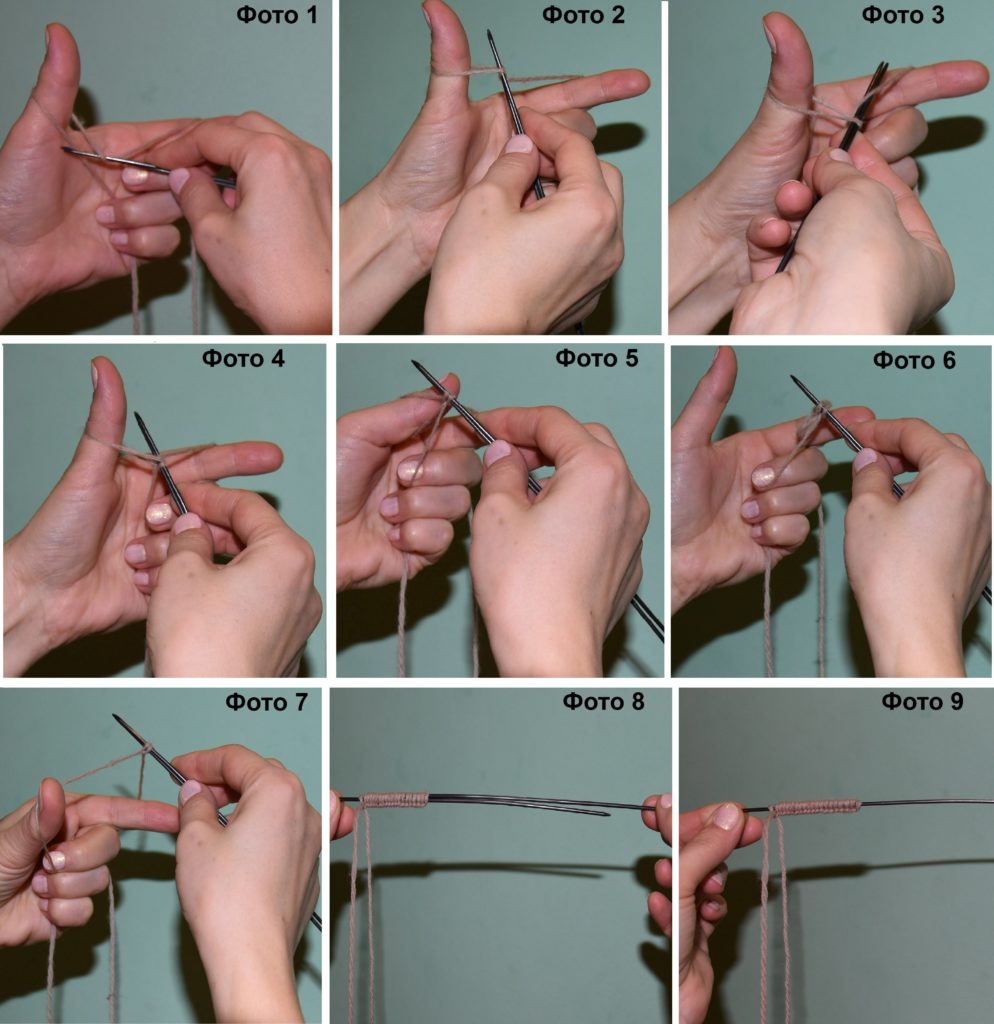
- Take two knitting needles folded together in your right hand.
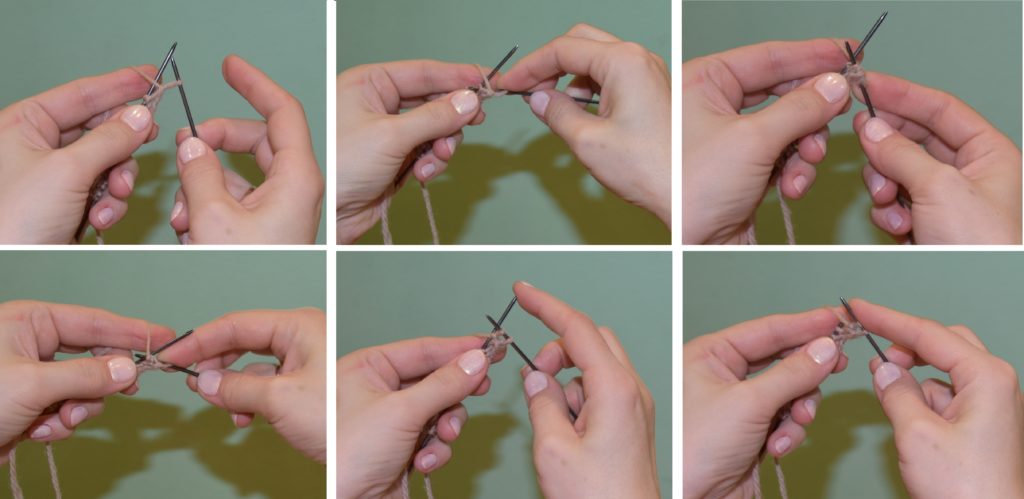
- Pry the thread between your thumb and forefinger. You need to do this towards yourself (photo 1).
- “Dive” under the front thread, but away from you, so that the knitting needles are in the same loop with your thumb (photo 2).
- Hook the working thread on your index finger from right to left (photo 3-4).
- Pull it through the thumb loop, then drop the last one (Pic 5-6).
- Pull both threads, spreading fingers 1 and 2 (photo 7).
- Now you have two loops. To score the remaining 18, repeat all steps from steps 3 to 6 18 times.
- At the end, carefully pull out one knitting needle, leaving all the loops on the second (photo 8-9).
@textile-en.techinfus.com
Attention! You should not pull the threads tightly both when casting on loops and during further knitting, otherwise the work will be tight in every sense of the word.
Facial
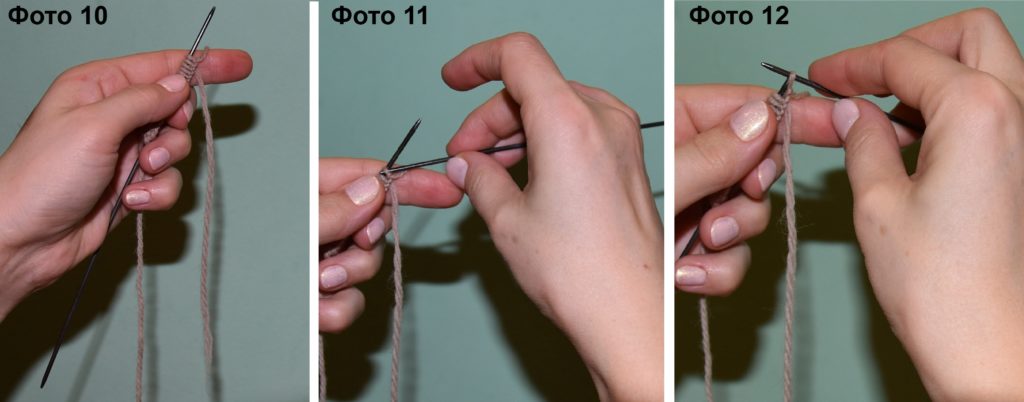
To start knitting, take the knitting needle with loops in your left hand so that the working thread is on the right, lying on your index finger away from you (photo 10). The first loop is an edge loop; it is not knitted, but removed onto another knitting needle (photo 11-12).
@textile-en.techinfus.com
From the second to the penultimate one, perform the following manipulations:
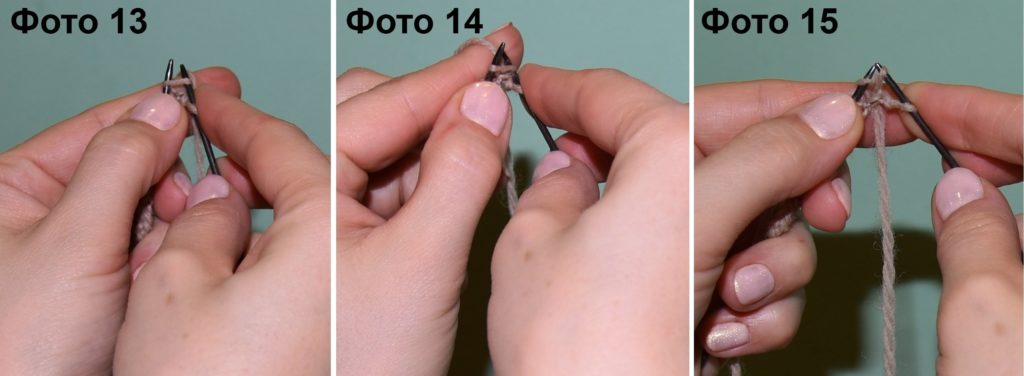
- hook the loop from below (photo 13);
- grab the working thread on your index finger (photo 14);
- pass it in the opposite direction through the stitch of the previous row on the left needle (photo 15), and then remove the last one.
@textile-en.techinfus.com
Purl
To obtain smooth edges, the first - edge - loop of the row is removed, and the last one is knitted purlwise. In order to receive it, you need:
- Throw the working thread onto the left knitting needle;
- pass the right knitting needle inside the loop from top to bottom (photo 16);
- pull the loop towards you, hook the working thread, pull it up, and remove everything from the left knitting needle (photo 17-18).

@textile-en.techinfus.com
Then we transfer the knitting needle with the loops to the left hand, and the free one to the right. On the reverse side, the front loops look like purl loops. You need to remove the first loop and purl the rest.
@textile-en.techinfus.com
The simplest patterns of knit and purl stitches
Knit and purl stitches are the basis of any knitted fabric. A pattern in which all odd rows consist of knit rows, and even rows consist of purl rows, is called stocking or satin stitch.

@textile-en.techinfus.com
If you knit only with knit stitches (except for the last stitch in each row), the fabric will be the same on both sides. This - shawl knitting

@textile-en.techinfus.com
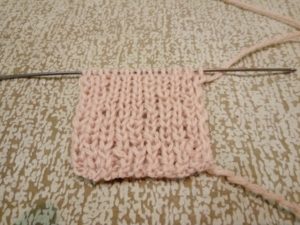
Consistently alternating 1 knit with 1 purl will give elastic pattern 1*1. It tightens the fabric a little and is used for knitting scarves.
@textile-en.techinfus.com
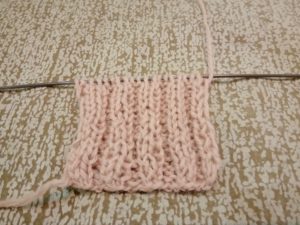
If you alternate 2 knits and 2 purls you get elastic band 2*2. Knitting socks usually starts with it. In this case, the number of loops when casting on should be a multiple of 4.
@textile-en.techinfus.com
Having mastered the basics, you can knit simple things yourself: scarf or snoodand then a vest or socks. Having learned to read the symbols and practiced how to knit each element of the pattern, you can knit any pattern you like. Of course, before everything works out, you have to try, since any skill must be practiced. But by bringing your knitting technique to automaticity and using your imagination, you will learn to create stylish, unique items that no one else will have but you.
You can watch a video tutorial on this topic Here.


 0
0