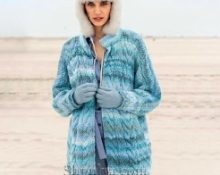
A sleeveless vest or a vest with a hood - regardless of the name, they will be comfortable to wear and practical. They can be worn to school, work, outings with friends and for many other occasions. Many people mistakenly believe that a vest can only be combined with jeans. It looks great with other items from your basic wardrobe.
Sleeveless vest with hood and braid pattern
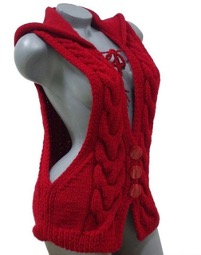 The braid pattern always looks advantageous and attracts all the attention. For this reason, products with braids are perfect for beginner needlewomen. It will be easier to hide minor flaws in them.
For knitting you will need:
- Yarn 100m/100g – 600g;
- Knitting needles No. 6;
- Buttons;
- Needle.
Advice: it is worth knitting a test sample measuring 10*10 cm in order to accurately determine the required number of loops, since the knitting density is different for all knitters.
Progress
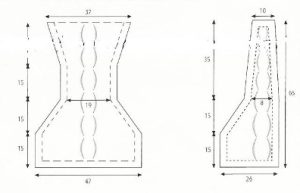
Cast on 43 loops, knit 5 cm with an elastic band, alternating 1 knit and 1 purl loop.
Then continue knitting as follows: knit 6 repeats of elastic, 16 knit stitches, 1 purl, 14 knit and again 6 repeats of elastic.
After knitting 6 rows, start knitting a braid. It is located on 16 facial loops. To do this, remove 4 loops on an additional knitting needle, move them behind the work, knit 4 knit stitches, return to the loops on the additional knitting needle and knit them. Knit the remaining loops in the same way, but move the initial 4 loops on an additional knitting needle in front of the work, and not behind it.
After repeating the pattern 3 times, start decreasing from the outer edge. To do this, in the front rows, decrease 1 loop until they end.
Having knitted another braid, begin to decrease the loops on the other side, in each even row, forming a neckline.
8 the braid should become smaller by 2 loops. The bundles will consist of 6 loops. In this way, tie 3 more braids. After this, reduce the number of loops by another 2 so that the bundles consist of 4 loops. Knit 4 more braids and set aside knitting. The loops must be secured to a knitting needle or a special holder.
Make holes for buttons in the 33rd and 20th rows of the strap.
The left half is knitted similarly to the right, but in a mirror image.
Back
Cast on 67 stitches and knit 5 cm, alternating 1 knit stitch and 1 purl stitch. Next knit as follows: repeat alternating 1 knit stitch and 1 purl loop 6 times, knit 18, purl 1, knit 2, purl 1, knit 16, purl 1, knit 2, purl 1, knit 18, 6 repeats alternating 1 knit and Purl 1.
On 16 front loops, knit a braid pattern by analogy with the description in the shelves.
Knit 20 rows and start decreasing stitches.To do this, after the last 6 loops, close off 1 loop. Continue decreasing until the stockinette stitch consists of 5 stitches.
After this, knit another 15 cm, maintaining the same number of loops. Next, start adding loops. After the elastic band, add 1 loop in even rows on each side. Complete the increase when the number of knit stitches reaches 10.
Secure the elastic loops to a knitting needle or holder. Knit the remaining loops as usual.
Hood
All loops of the shelves, with the exception of the outer loops of the elastic bands, are cast on the knitting needles. The entire hood is knitted in one piece. In this case, on each side, 6 loops are left for the elastic band, and the rest are knitted with knit stitches. After knitting 2 rows, add 1 more loop every 5 stitches.
Knit another 28 cm and bind off all the loops.
Assembly
Sew side seams. Sew the loops located on a special holder or knitting needle with a knitted seam. Sew the hood. Sew buttons on the left shelf.
 0
0