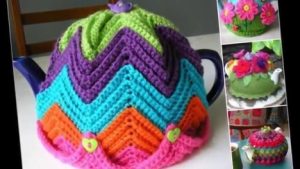
Crocheting is a fascinating type of needlework. If you are new to this business, then you should start with simple products. If you are interested in how to crochet a teapot even for beginners, then this article will definitely suit you.
Selection of yarn and hook
To knit a teapot, you can use any yarn that is suitable for a hook. But if you want your teapot to look like a real one, then it is better to choose beige or brown yarn. The hook should be selected in a size that matches the selected yarn.
To crochet a teapot you will need the following materials:
- Yarn in the selected color and composition;
- Filling (cotton or synthetic material);
- Sewing threads.
Tools:
- A suitable size hook (usually 2mm to 4mm hooks are used, depending on the thickness of the yarn).
- Scissors.
- Marker or thread for marking rows.
- A knitting needle or a large needle for sewing on details.
Beginning of work
To get started, you need to knit a magic ring and knit 6 single crochets inside the ring. Then close the circle and knit 2 stitches into each stitch of the previous row.
Reference: magic ring is a beginning crochet technique that allows you to create a closed loop to begin working with circular knits. It avoids the hole in the center of the work that is created when using the traditional method of starting knitting. This method is especially useful for knitting toys and other circular projects that start from the center.
Bottom formation
Next you need to start shaping the bottom of the teapot. To do this, knit each next row without increasing until the bottom diameter reaches the size you need.
Formation of walls
After the bottom of the kettle is ready, you can begin to form the walls. To do this, you need to knit several rows of single crochets, without increasing. Then, to make a protrusion on the kettle handle, you should knit 5 air loops in the right place and continue knitting according to the pattern.
Forming the cover
The lid is knitted separately and then sewn to the body of the teapot. To do this, you need to knit a magic ring and knit 6 single crochets inside the ring. Then knit each next row without increasing until the diameter of the lid reaches the desired size.
Decoration of the teapot
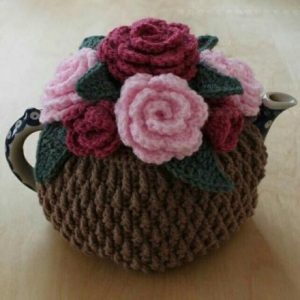
Once the body and lid of the teapot are connected, you can begin decorating. To do this, you can use various techniques: embroidery, sewing on parts from other yarns, etc.
Shutdown
When the crocheted teapot is ready, you need to fill it with filler and close the top.Cotton or synthetic material can be used as filling. To close the top, you can knit the lid or simply sew on a piece of fabric.
Using a knitted teapot
A knitted teapot can be an excellent decorative element of your interior. It will be especially useful in the kitchen or living room. It can also be used as a stand for hot items.
conclusions
Crocheting a teapot is a simple and fun way to learn to knit. If you are new to this business, then start with simple items such as a teapot. And don’t forget to experiment with different materials and design techniques to create a unique piece with your own hands.
 0
0