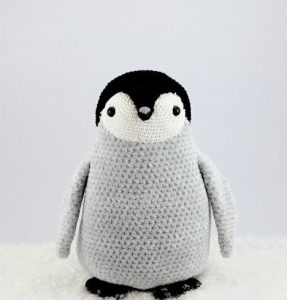
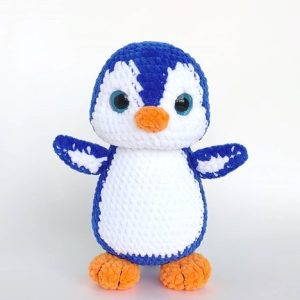
Penguin is a very cute and popular character that can be a wonderful gift for children and adults. In this article we will tell you how to crochet a penguin using an amigurumi pattern - a Japanese technique for crocheting toys. Our master class “Crochet a penguin made from plush yarn” will be useful for beginners. It is suitable for those users who are just trying to get acquainted with this exciting technology.
Materials and tools
Before you start knitting, you will need the following materials and tools:
- yarn in black, white and orange colors;
- hook size 2.5 mm;
- scissors;
- stuffing for toys;
- sewing needles.
Beginning of work
Start by creating a crochet penguin pattern to fit your measurements. Next, move on to knitting the penguin head. To do this, make a magic ring from black yarn and knit 6 single crochets in the ring. Then knit 2 stitches in each stitch of the previous row to make 12 stitches.
In the next row, knit 1 single crochet, then 2 single crochets in the next loop and repeat until the end of the row.
Continue knitting the next rows until the diameter of the head reaches the desired size. Usually 8-10 rows are enough.
Penguin body
To knit the body of the penguin, use white yarn. Start with a magic ring of 6 single crochets and increase the number of stitches each row by 6 until the body diameter is sufficient. Usually 24-30 loops are enough.
Continue knitting the body without increasing the number of stitches until it is long enough. Usually 20-25 rows are enough.
Knitting arms and legs
To knit penguin arms and legs, take black yarn and a 3 mm hook. First, knit your hands.
Amigurumi penguin hand pattern for crochet:
- Start with a magic ring of 6 single crochets.
- In the next row, double the number of stitches by knitting two double crochets into each single crochet.
- On the next row, work one double crochet into the first stitch, and work two double crochets into the second row. Repeat this pattern until the end of the row.
- And in the next row, knit one double crochet into the first stitch, and knit one double crochet into the second stitch. Repeat this pattern until the end of the row.
- On the next row, work each single crochet twice to double the number of stitches.
- Next, knit the first single crochet, then knit two double crochets, repeat this pattern until the end of the row. Repeat this pattern a second time to knit the second leg.
Penguin assembly
When all the parts of the crochet penguin amigurumi pattern are ready, start assembling. Connect the head to the body by sewing them to each other. Then sew the arms and legs to the body.Don't forget to stuff the arms and legs before sewing.
Adding details
To create the eyes, use black and white yarn. Make two small balls of white yarn and sew them onto your head. Add black threads for the pupils.
To create the penguin beak, use yellow yarn and make a small triangle. Sew the beak to the head between the eyes.
You can use pink yarn to create penguin cheeks. Make two small circles and sew them on the sides of the head. You can also make your own adjustments to the amigurumi penguin crochet patterns.
conclusions
Crocheting an amigurumi penguin according to the pattern is a great way to start your journey in knitting toys. By following this simple diagram and instructions, you can create a beautiful and original toy with your own hands. Don't be afraid to experiment with different colors and materials to create a unique penguin. And most importantly, enjoy the knitting process!
 0
0