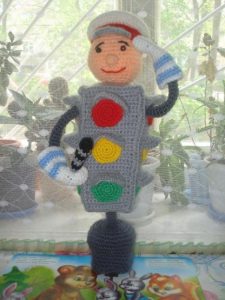
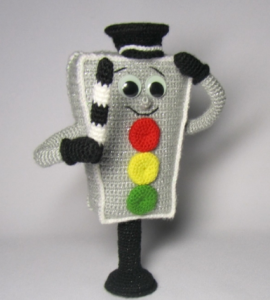
Crocheting is not only an enjoyable hobby, but also a way to create unique and original things. A crocheted traffic light is a fun and unusual project that can be of interest to both beginners and experienced crafters. This cute accessory can be an excellent decor for a child's room or an original gift.

Traffic light knitting basics
Before you start crocheting a traffic light, you need to prepare everything you need. You will need yarn in primary colors - red, yellow, green and black, as well as a hook of a suitable size. The choice of yarn affects the appearance and size of the finished product, so choose it carefully.
Selection of materials
Selecting the right yarn is critical to successfully creating a crochet traffic light. The ideal yarn should not only be attractive in color and texture. It must be strong enough so that the product can maintain its shape and withstand frequent use.Cotton yarn is an excellent choice. It is soft, pleasant, but at the same time provides sufficient knitting density. Acrylic threads are also suitable due to their durability and wide selection of colors. It is important to choose yarn that is easy to wash and does not cause allergies. This is especially important if the traffic light is intended for a children's room.
Selecting the right hook also plays an important role in the process of crocheting a traffic light. The hook size should match the thickness of the selected yarn to ensure an even and neat knitting. As a rule, hooks between 3 and 5 mm are suitable for medium thickness yarn. In addition to the hook, you will need scissors to cut the thread and a blunt needle to assemble the traffic light parts. A row counter can also be useful to help you follow your knitting pattern exactly and not get lost in the number of rows.
The color palette plays a key role in creating a crochet traffic light, as it must closely match the actual colors of the traffic light: red, yellow and green. Choose bright and rich shades to make the traffic light look vibrant and realistic. You can also experiment with different yarn textures, such as adding a little sparkle or using yarn with color transitions to create a unique effect. It is important that the colors are durable and do not fade after washing, maintaining the brightness and clarity of the pattern for a long time.

Step-by-step knitting instructions
Crocheting a traffic light is not as difficult as it might seem at first glance. Here are the step-by-step instructions:
- Start by knitting a rectangle in black. This will be the basis of the traffic light.
- Then start knitting circles in red, yellow and green. These circles will simulate traffic light signals.
- Once all the pieces are ready, carefully sew the colored circles onto the black rectangle.
Decorative elements and finishing touches
After the main part of the traffic light is crocheted, it's time to add decorative elements that will make your product even more attractive and original. You can use embroidery or beading to add details such as street names or house numbers, which will give the traffic light a more realistic look. You can also add small reflective elements or sparkles to make the traffic light more noticeable and interesting, especially if it is intended for a child's room.
An important aspect when creating a crocheted traffic light is safety, especially if the traffic light is intended for children. Make sure that all decorative elements are securely sewn on and will not come off easily. Use threads that hold well and do not cause allergies. If you use small parts such as buttons or beads, make sure they are securely fastened to prevent them from accidentally coming off and falling into the hands of small children.
Once all the elements are secured, your crocheted traffic light is ready. However, it is worth remembering about proper care of a knitted product. Gentle hand washing in cool water with a mild detergent is recommended to keep colors vibrant and prevent warping. After washing, carefully dry the traffic light, straightening it in its natural shape. Such care will help your product maintain its original appearance for a long time and be safe for use.
Conclusion and recommendations
Crochet traffic light diagram and description are just the starting point for your creativity. Don't be afraid to experiment with sizes, colors and textures. A project like this will not only help develop your crochet skills, but will also bring a lot of joy in the creation process. Crocheting a traffic light is a great way to make something special with your own hands.


 0
0


