It will not be a secret for experienced knitters that there is elastic on almost all knitted items - warm skirts and jumpers, hats, scarves, cardigans and even socks - all these things must have an elastic band. However, this is also understandable to novice knitters who are just learning the basics of skillful knitting.
However, many beginners often do not realize that there are more than 20 varieties of elastic bands, which differ in shape and method of knitting. There are elastic, embossed, voluminous and tight ones, as well as those that are knitted exclusively with two types of loops - knit and purl, or more complex ones - where yarn overs are used. Moreover, their creation is so simple that if you try it at least once, your hands will then understand what to do and skillfully knit a beautiful and elastic fabric. It is precisely one of these rubber bands that we will talk about, and they call it by a fancy “overseas name” - Canadian.
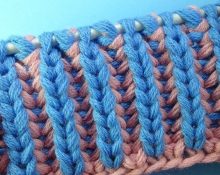
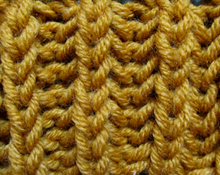
Knitting Canadian elastic with knitting needles: diagram
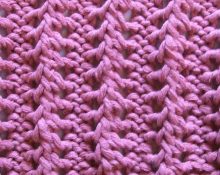
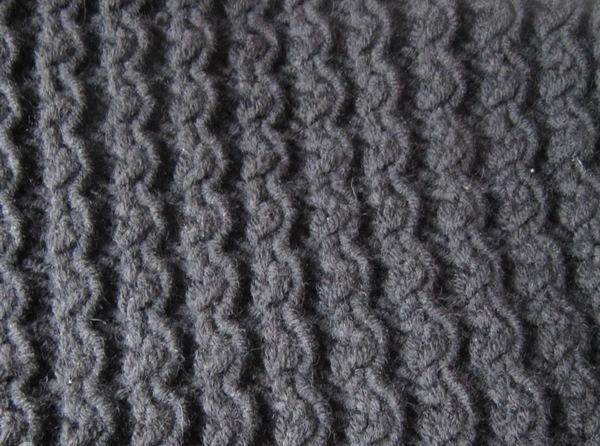
If you look at photos on forums and master classes on knitting Canadian elastic, it may seem that the process of creating a pattern is too complicated and will not be easy to cope with. In fact, everything is not so, because only two types of loops are used for work - front and back.
Canadian elastic is the very detail that looks simply amazing on finished products. Having mastered this pattern, you will easily create beautiful, cozy, warm and elegant things.
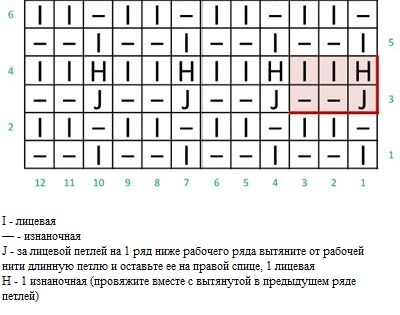
To knit Canadian elastic with knitting needles, you need to cast on a number of loops that is a multiple of three and in no case forget about two edge loops. These links, as a rule, are not indicated on the diagram, but they must be added so that the fabric looks neat, does not lose its shape, and the parts of the product are connected symmetrically. Description of the scheme by rows:
- 1st: edge loop, then knit 1 knit and 2 purl stitches alternately until the end of the row and close with an edge stitch.
- 2nd: again - edge loop, knit 2 and purl 1 and so on until the end of the row, closed with an edge loop.
- 3rd: edge stitch, knit 1, then pull the loop out of the broach onto the left knitting needle and knit it, then purl 2, and repeat until the last loop in the row, which is closed with the edge stitch.
- 4th: edge stitch, knit 2, purl 2 together, repeat until last stitch, bind off edge row.
- To display the pattern, do not repeat rows 1 and 2, but only rows 3 and 4.
Such a simple process, and what a wonderful result! To make it easier to understand the Canadian rib knitting pattern, watch the video - this way you can finally understand how it is done.
 0
0