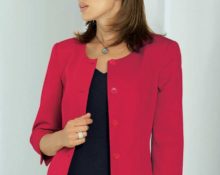
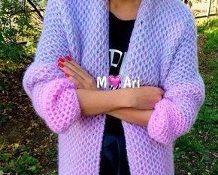
Cape - one of the types of capes, the fashion for which came from England. Many people confuse a cape with a poncho, but a cape has a number of special characteristics that distinguish it from a poncho. These are a clear, pronounced shoulder line and cutouts for the arms, which the poncho does not have.
Capes can be either rectangular or oval, with or without a collar. Many fashionistas prefer this type of cape, as they are not only cozy, but also fit any figure. And knitters choose capes not only for their ease of creation, but also for the large scope for the expression of imagination.
If you have ever tried knitting and know how to cast on and bind off stitches, you can already try knitting a light cape model according to the description.
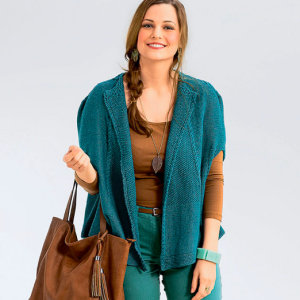
This model is universal and will suit girls of any age and build. It perfectly hides figure imperfections and does not weigh down the top.
To create this cape you will need approximately 150 g / 50 m of yarn and size 4.5 knitting needles.For ease of calculation, it is best to use markers (8 pcs required)
The following patterns are used in knitting this cape:
- Pearl. Row 1 – knit and purl stitches alternate.
2nd row - also alternate, but the front one is knitted over the purl one, and the purl one over the front one, according to a checkerboard pattern; - Facial surface. Row 1 – all knit stitches. Row 2 – purl all stitches;
- Purl stitch. Row 1 – purl all stitches. Row 2 – all stitches are knit;
- Shawl. All stitches are knit stitches.
Braid with 4 loops. Knit according to the pattern:
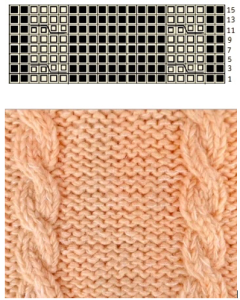
The knitting direction for this pattern is top to bottom. It is knitted without seams, that is, as a whole fabric, and the increases are calculated in accordance with the pattern.
Progress
1 step. Neck strap set. On circular knitting needles you need to cast on 121 loops and distribute them in such a way that every 4 loops reserved for the braid, 1 purl loop is repeated. Thus tie it to a height of 2 cm.
Step 2. Distribute the loops as follows: 1 – edge loops, 4 – braid, 18 – pearls, 1 – marker No. 1, 4 braids, 7 – purl loops, 1 – marker No. 2, 4 – braid, 1 – marker No. 3, 23 +1 increase - pearls, marker No. 4, 4 - braid, 1 - marker No. 5, 7 - purl stitch, 4 - braid, 1 - marker No. 6, 18 - pearls, 4 - braid, 1 edge stitch. Total 122 loops. Next, knit according to the pattern.
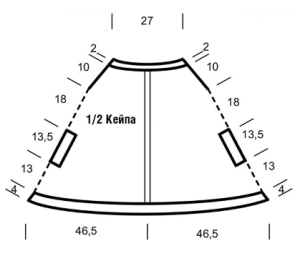
To get a flared silhouette, you need to make broaches from markers 1 to 6 every fourth row 5 times, and 23 times in every 6th row. This pattern will add 168 loops.
One of the most difficult parts of knitting is calculating the shoulder allowances, which you need to pay special attention to in order to create correctly defined necklines.The braids in this model serve as a kind of marker, and the shoulder line is drawn from them in each row of broach for 30 rows. The broaches are made with a crossed loop, the reverse of the pattern. That is, from the front to the back, and from the back to the front. The result is 120 new loops.
30 rows of garter are 10 cm, you need to select the middle and mark it with markers No. 7 and No. 8.
The division for the neckline is made after 18 cm of knitting, or 54 rows. The division is tied at 13.5 cm, and then the loops are connected again and the fabric is knitted completely with purl stitch, only the outer braids remain.
According to the pattern with allowances for flaring, you need to tie 54.5 cm from the top bar. Next, the bottom strip is made in garter stitch, its width is 4 cm.
As a result, at the end of knitting, there are 410 loops on the knitting needles, which need to be closed in any convenient way, with knitting needles or crochet.
Advice: After knitting, you must wash the product by hand in warm water and dry it on a horizontal surface, unfolded, without hanging it. This way the finished product will take its final size, the loops will shrink and will be durable to wear.


 0
0
