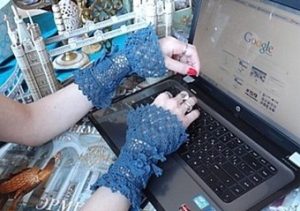
Knitted cuffs come to the rescue when you want to diversify your look. They will add zest to it. Their production will not require a lot of time and large financial expenses, since they can be knitted from leftover yarn available at home. It is important that it is thin, so their openwork will be more noticeable.
Lace cuffs "Hatter"

Required materials and tools:
- Kamtex “Dandy” yarn;
- hook No. 0.75;
- tablet or cardboard base for knitting;
- thick paper;
- needles;
- buttons optional;
- scissors.
Progress:
- Draw a trapezoid on thick paper. Its smaller base coincides in length with the girth of the wrist minus 1 cm. The length of the opposite side is the girth of the arm at the place where the cuff ends, also minus 1 cm. On average, a trapezoid is obtained with bases of 15 and from 18 to 19 cm, height , equal to 8 cm.
- Transfer the prepared element to the tablet and secure it carefully.
- Tie a snake from the VP and spread it around the perimeter of the trapezoid, secure with needles, sew the ends.
- Place the pre-prepared decorative elements face down on the tablet. It can be simply openwork motifs, flowers, leaves and much more. They need to be secured with needles.
- Tie all the elements with a net and remove everything from the tablet.
- Tie the upper and lower sides of the cuff with a pattern consisting of alternating 1 dc and 1 ch.
- Along the top edge, knit about 3 centimeters of an openwork pattern. At the bottom, tie 5–7 cm of the same pattern.
Lace Pattern:
- 1 r.: 1 VP, RLS, * 3 VP, lower 4 loops from the previous row and knit 1 SSN, 1 VP and 1 more SSN in the next row. Cast on 3 VP and knit 2 sc in the 9th and 10th stitches of the row below*. Continue knitting by copying the pattern from * to *.
- 2 r.: lifting loop, * 4 VP, 5 SSN in an arc from VP of the previous row, 4 VP, 1 RLS *. Change from * to * until the end of the row.
- Extend the knitting by changing rows 1 and 2 to the desired length.
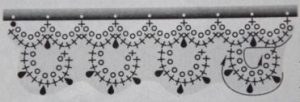
- Tie the finished cuffs in rows with picots according to the pattern.

- Knit the second cuff in the same way.
- Sew buttons to the finished cuffs and make loops. Openwork cuffs are ready!
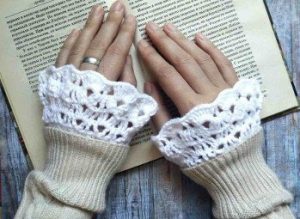
Cuffs for school uniforms

School uniforms often seem very boring; you want to somehow diversify them. Openwork cuffs are very helpful in this case. The main thing is that they are combined with the rest of the image and do not contradict the accepted rules. You can immediately prepare several options: for everyday wear, for special occasions.
Required materials and tools:
- Cotton yarn.
- The hook is the right size.
- Needle.
- Buttons or satin ribbons.
- Scissors.
Progress:
- Start with a chain made of VP, the length of which will be 1 cm longer than the length of the wrist. The total number of loops should be divided by 4 and an additional VP.
- 1 rub. – SSN. 2 VP and knit another double crochet stitch*. Continue knitting, alternating from * to *.
- 3 r. – into the arc from the VP of the underlying row, knit two stitches with 2 double crochets, then 2 VP and again two stitches with 2 double crochets. In those places where 1 stitch with 2 crochets is knitted in the underlying row, we similarly knit 1 stitch. Extend the row by changing double crochets and chain stitches.
- 4 rub. – knit in the same way, but in arcs from VP, knit 1 more stitch with 2 double crochets, that is, 3 stitches.
- 5 rub. – in each arc of air loops, knit 8 double crochets. In a single stitch we also knit 1 stitch with 2 double crochets.
The second cuff is knitted similarly.
Finally, trim off all excess thread ends. Sew buttons to the cuffs and make loops for them. If desired, the buttons can be replaced with satin ribbons, then the cuffs will look more elegant. Openwork cuffs for school uniforms are ready!


 0
0


