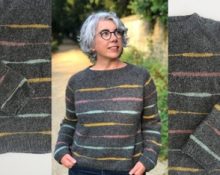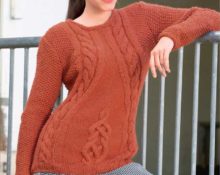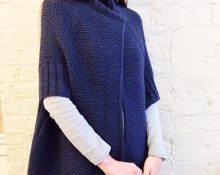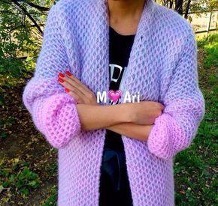
The mesh patent pattern is one of those patterns that is often used and this is due to its ease of execution, as well as its versatility. A product knitted with such a pattern can have various purposes. It looks great in women's cardigans, pullovers, hats and scarves.
The main product can be added along the edge with an elastic band, which will give it some completeness.
Mesh Pattern Feature:
- Volume and elasticity. This means that knitting will require a little more yarn than for knitting a product with any other pattern.
- The sides of a product knitted with this pattern are identical, so the mesh pattern is suitable, for example, for clothing items with lapels.
- After washing, the product can stretch and lose its shape, so the calculation of the number of loops and the density of the fabric is done only using a washed and dried fragment.
- The pattern is created from patent loops.
- The pattern on the product appears protruding and loose.
Method of tying loops in a mesh patent pattern:
Option 1: First we make a yarn over, remove the next loop, without knitting.
Option 2: We knit loops from the bottom row.
A patent loop may have not one yarn over, but several, for example, three.
Drawing "Honeycomb"
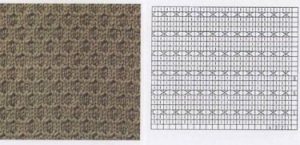
The first knitting option is considered the simplest; the number of stitches to cast on must be even:
- Row 1: knit completely from knit stitches.
- Row 2: knit one knit stitch, one yarn over. So we alternate and knit the entire row.
- Row 3: first we knit a knit stitch, throw off the next yarn over (the thread should be behind the fabric), knit a loop again.
- Row 4: knit with a double crochet, slip the one behind it, knit the next one with a double crochet.
- Row 5: knit 2 knit stitches, remove the yarn over, etc.
- Row 6: Yarn over, knit yarn over, yarn over, remove.
- Row 7: start repeating from row 3.
Second knitting option
Cast on an even number of stitches.
- 1st row: we knit the whole thing with facial loops.
- Row 2: knit 1, slip 1 as a purl with double crochet, alternate in the same sequence until the end of the row.
- 3rd row: 1 knit with double crochet, 1 knit, alternate until the end of the row.
- Row 4: knit 2 with double crochet, fold the next one as a purl.
- Row 5: 1 knit, 1 knit with double crochet, alternate, making the last two just knit.
- Row 6: start repeating from row 2.
Third knitting option
We cast on a number of loops equal to any even number.
- Rows 1 and 2: knit.
- Row 3: K1, one stitch from the bottom row and alternate until the end of the row.
- Row 4: We form 1 loop from the bottom row, one from the front row.
- Row 5: we form the first one from the bottom row, the next one is the front one.
- Row 6: change and knit first, then from the bottom row.
- Row 7: we begin to repeat the pattern, knitting from the 3rd row.
Fourth knitting option
The beginning coincides with the previous knitting options: we cast on an even number of loops.
- Rows 1 and 2: knit with knit stitches.
- Row 3: the first stitch is from the bottom row, the second is a simple knit stitch, alternate until the end of the row.
- 4th row: first - front, second - crossed with extension, third - front crossed. We alternate further in the same order.
- Row 5: one stitch from the bottom row, the second from the front row, follow this sequence until the end of the row.
- Row 6: cross the first loop from under the pull with the front loop, the next one is the front loop. We repeat this further.
The mesh patent pattern is not popular among novice craftswomen because it is believed that it is difficult to perform, but this is not the case. If something from the step-by-step instructions is not clear, you can always resort to video tutorials. Once you learn how to knit, it will become clear how easy it is.
 0
0