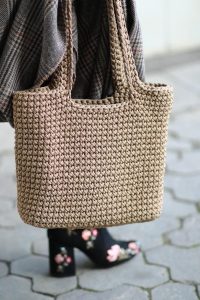
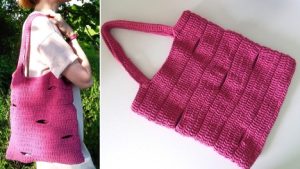
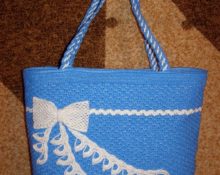
Knitted shopper bags are not only stylish and practical, but also easy to make even for those who are just starting their knitting journey. Today we will look in detail at how to crochet a shopper.

Materials and tools
To knit a shopper you will need:
- Hook. The size is selected based on the type of yarn. Typically, 3.5-4.5 mm hooks are used for such work.
- Yarn. You can use both natural materials (cotton, linen), and mixed or synthetic ones. It is important that it is strong enough.
- Knitting markers (if available).
- Scissors.
Knitting warps
Before you start work, decide on the size of your future shopper. The average size of a bag is 35x40 cm. Note that a knitted bag tends to stretch, especially if it is filled with heavy things, so you should not make it too large.
- First we knit the bottom of the bag. Start by knitting a chain of chain stitches. The number of loops depends on the desired width of the bottom of the bag.For example, if the width of the bottom of the bag is 10 cm, you need to knit a chain equal to this size.
- Then we knit a row of single crochets along the entire length of the chain.
- To make the bottom of the bag rectangular, continue knitting in the opposite direction, turning the knitting.
- Continue knitting until the bottom reaches the desired width.
Knitting walls
After the bottom of the bag is ready, you can proceed to knitting the walls. Here you can already allow yourself creative freedom and knit with any pattern you like.
- The first row of bag walls begins with single crochet stitches along the edge of the bottom.
- You knit the next rows according to the pattern of the selected pattern. It can be a “relief column”, “granny square”, “pigtail” or any other pattern to your taste. If you are a beginner, try to choose simpler patterns.
- Continue knitting the walls to the desired height of the bag.
- Knit the last row of walls with single crochets to strengthen the bag.

Knitting handles
Handles for a bag can be made of different lengths, depending on how you prefer to carry the bag. Some people prefer short handles so they can carry the bag in their hands, others prefer long handles so they can hang the bag on their shoulder.
- Choose a place where the handles will be located and leave a gap at this place without knitting several loops. These will be the “holes” for the handles.
- In the next row, knit these holes with single crochets.
- Repeat this process as many times as you feel necessary to obtain a comfortable handle length.
- When the handles are ready, finish the row with single crochets.
Final stage
Now all that remains is to “pack” the bag. If you knitted the bag in circular rows, then you did not get a seam, and you can skip this step.If you have a seam, you will have to carefully sew it up.
This concludes our master class on the topic “how to crochet a shopper bag for beginners.” We hope you enjoy and can create your own unique knitted bag!


 0
0


