Each of us can learn to cross stitch on canvas. Of course, everything doesn’t happen at once. The ability to embroider huge pictures comes with experience, but you always have to start small. In this article we will tell you what you will need to prepare for work. Beginners will learn about the most popular types of cross stitches, as well as how to make embroidery truly beautiful.
How to cross stitch on canvas
There is a myth that this type of needlework is more of a hobby, and is mastered by those who have a lot of free time. We hasten to destroy this stereotype. Cross stitch is a real art and painstaking work. But what a result! If you master this craft, you can create paintings of incredible beauty.
What you will need
First of all, go to the store for embroidery materials. Today, special kits are sold, which include canvas, threads and a pattern. This is, of course, more convenient: you can buy the simplest possible scheme (look for sets for children or for beginners) and practice on it.This type of embroidery is inexpensive and does not require any special knowledge.
Important! Buy sets with bright patterns and lots of contrasting threads. If you take embroidery with several varieties of the same color, it will be difficult to work: the shades can be easily mixed up, and the design may not work out.
Typically the set includes:
- embroidery pattern;
- instructions;
- canvas;
- a set of threads;
- one or more tapestry needles (it’s better to buy a set in a store).
This is a conditional composition; each set contains a different set of items for embroidery.
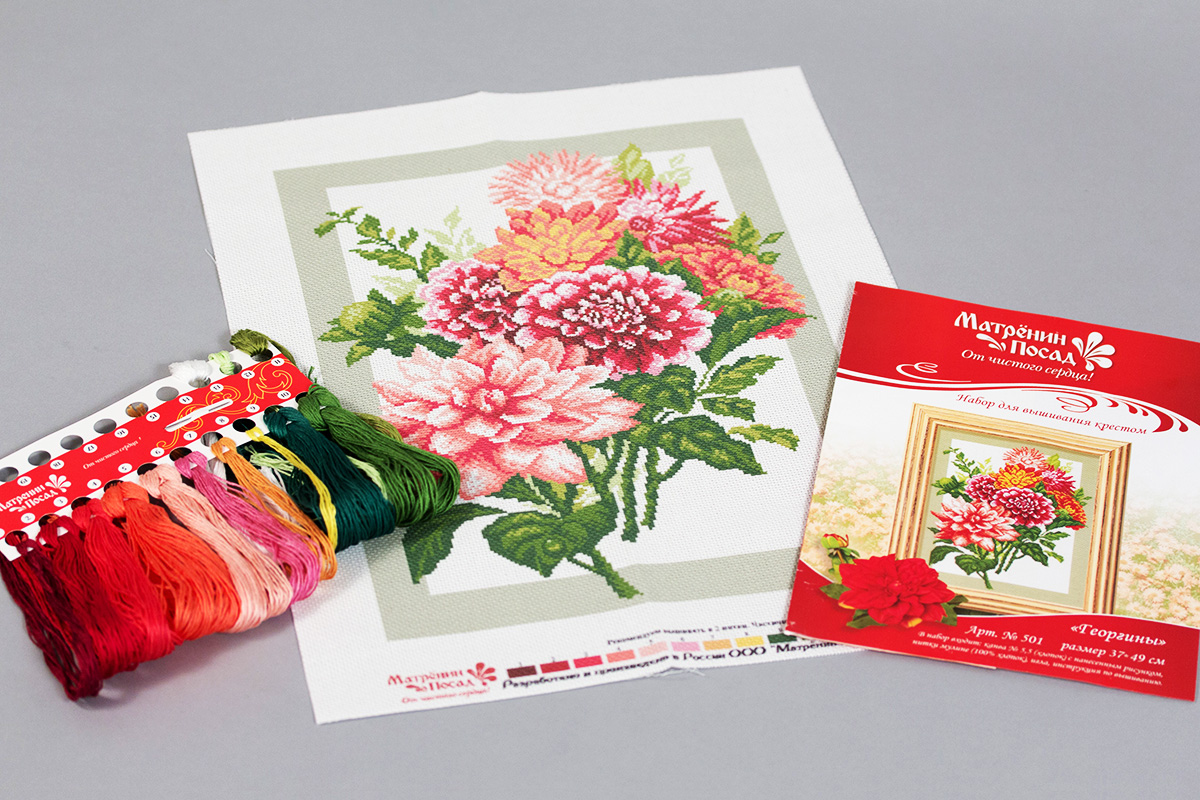
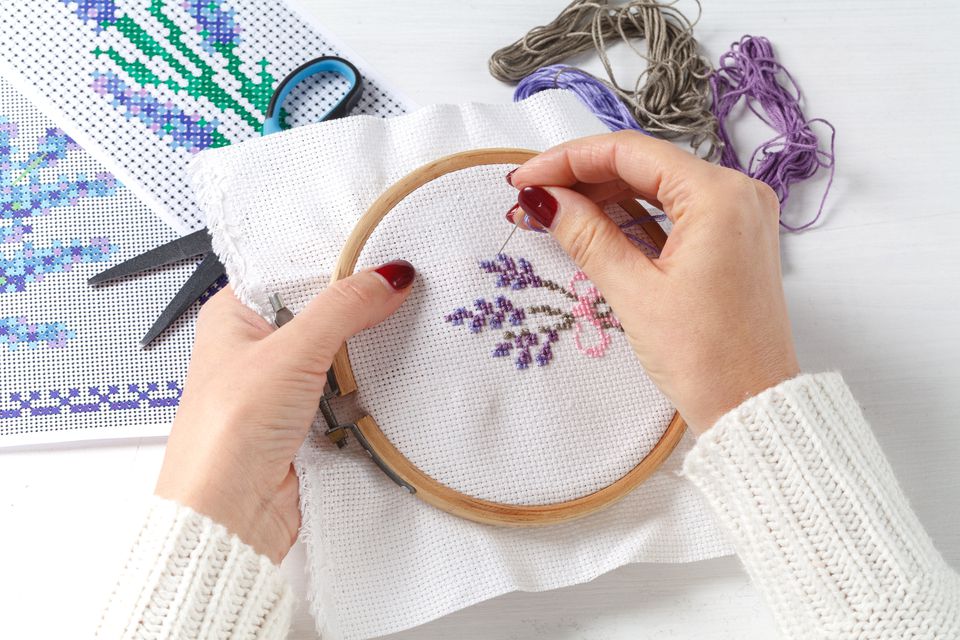
In addition to the set, you need to buy a hoop and scissors at a craft store.
You may also need the following accessories:
- markers;
- frames and clamps for them.
However, you can do without these devices: they are used to make work easier.
Experienced needlewomen can draw diagrams on their own. You will probably come to this too over time. In this case, all materials are purchased not as a set, but separately.
Preparing for work
You can’t just open the kit, take out the canvas and sit down to embroider. You should prepare for work:
- If you want to wash the canvas, do it before and not after finishing the work. The fabric may shrink after washing.
- The edges of some fabrics are fraying. To avoid this, treat them with special glue or stitch them with thread.
- Embroidering with a hoop is much easier than without it. You should not spare money on this tool. The better the fingers, the easier it is to work and the better the result.
The sets are different. One option is that the pattern is already applied to the fabric, then you can start embroidering right away. The second is when the diagram is on paper, but this is more difficult, since you first need to understand the schematic symbols of the threads, and then transfer the image to the fabric.
The canvas is conventionally divided into squares. One cross - one square.
How to secure threads to canvas at the beginning and end of work
You can make the usual knots on the reverse side of the embroidery, but experienced craftswomen do not do this. Knots tighten the fabric - because of this, the work is not as flawless as we would like. Therefore, it is better to immediately learn other ways of fixing threads. They are simple.
So, at the beginning of work, the thread can be secured with a loop. To do this, pull the needle and thread through one square. Then you need to get the needle. You will get a thread stretched through a square. All you have to do is insert both ends into the eye of the needle and you can get to work.
At the end, you should pull the thread through several sewn crosses on the front side of the canvas (no more than ten cells) and cut it.
If a knot is unavoidable, be careful not to pull the thread too tightly and ensure that the design does not become deformed. All knots must be made on the wrong side.
Making a single cross
There are a lot of options for crosses. We will talk about the most popular ones, and start with a simple single cross.
This is the basis of the basics, a traditional version of embroidery. A single cross is made by placing two identical stitches on top of each other.
The algorithm is as follows:
- We bring the needle from the wrong side to the front side. Important: on the wrong side you need to leave a tail 8-10 cm long.
- We work in a square of canvas. From the lower left corner on the front side you need to make a stitch to the upper right. You will get a diagonal stitch within one square of canvas.
- On the wrong side, move the needle and thread to the lower right corner, and pull it to the front side.
- Make a stitch in the upper left corner.
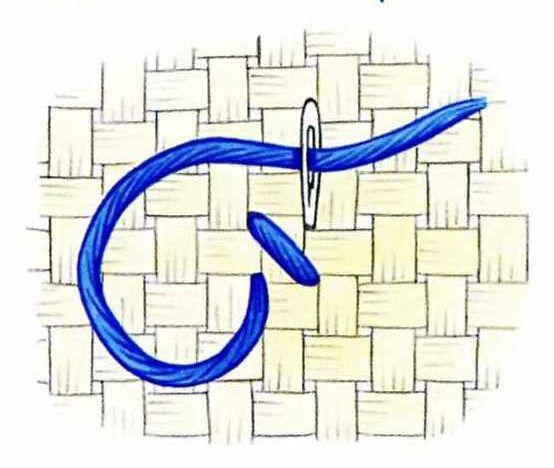
If everything is done correctly, you will get a neat cross. We do the same with the remaining squares of the canvas, moving in accordance with the diagram.
Embroider in rows of crosses
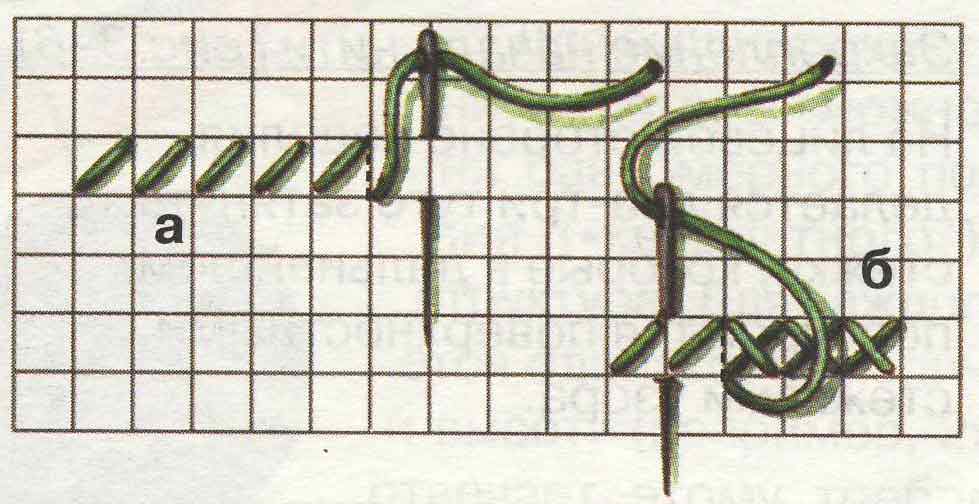
The method is similar to the previous one. First we make a series of diagonal stitches from right to left. The needle looks down.
When the row is completed, we complete it by making a cross stitch. Next, we go back and make crosses.
Double-sided cross
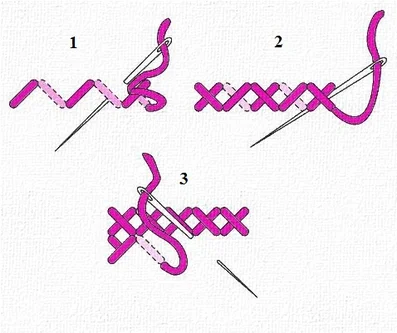
We make the first row with diagonal stitches through a square. We reach the end of the row and “turn” back. We move in the same sequence. The result should be full-fledged crosses located between squares with diagonal stitches. Then we make crosses in these missing cells.
Wicker Slavic cross
You need to move from left to right. At first glance, it seems that making such a cross is difficult, but it is not so. It's enough to try it once to understand how the thread moves. The further process will be easy.
Instructions:
- Make a long stitch across the check from the bottom corner of one square to the top corner of the other.
- On the wrong side, we draw a thread to the lower corner of the cell that we came to as a result of the first step.
- We pass the thread to the front side and make a closing diagonal seam in the upper corner of the cage.
- On the wrong side, move the needle to the lower opposite corner of the cage, thread it to the front side.
- Make a long diagonal stitch into the top corner through the check (much like in the first step).
- The last step is to draw the thread to the upper corner of the same cell. You should get another cross.
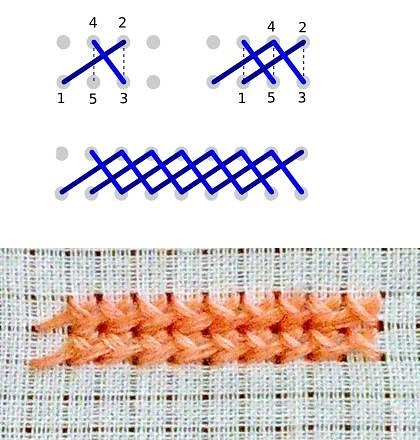
@originalnypodarki
What to consider to make the embroidery beautiful
Each type of needlework has secrets, without knowing which it will not be possible to do the job perfectly. Embroidery is no exception.
To make the result of this painstaking work pleasing, you need to take into account many nuances:
- All rows should face the same direction.If you started embroidering from left to right, then continue until the end of the work.
- The less experience, the simpler the schemes should be. Of course, you can immediately set your sights on a luxurious painting, spend money (and such sets are not cheap) and throw embroidery into the far corner, because it’s difficult. But you don’t need such a result, right? For training, buy sets with no more than four colors.
- It is more convenient to start working with dark colors.
- Make knots as a last resort, for example, if you forgot to leave a tail. Ideally, you need to leave the ends and hide them between the stitches on the wrong side when the work is finished, or secure them in the ways discussed above.
- The needle should be positioned vertically in relation to the canvas. The tip points either up or down, but not to the side!
- One cross - one square.
- Make sure that the needle always has an even number of threads.
- Don't waste money on hoops. The higher quality they are, the more accurate the embroidery will be. It is better to buy wooden rather than plastic hoops.
- Don't start working from the middle of the pattern: it's so easy to get confused in the pattern.
Finally, remember: everything will work out for those who try. Don't give up if something goes wrong, everyone makes mistakes. Embroidery is an interesting activity, and you will understand it when you learn it.
Video instruction


 0
0