kanzashi.com.ua
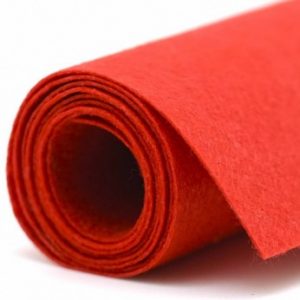
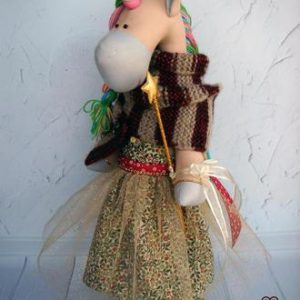
Felt is a unique material that is ideal for crafts. It is elastic, soft, and does not crumble at the edges when cut. The assortment includes a huge number of felt colors, so needlewomen can create real masterpieces. Photos showing the unique design of felt toys constantly appear on the Internet. A very popular felt toy is the horse. It is relatively simple to make, but the product turns out bright and colorful due to the mane, tail, and various color combinations. The pattern of a horse toy consists of several parts, so even if you are working with felt for the first time, you can make an excellent craft.
How to make a felt horse - pattern, description
The first thing you need to make a felt horse is a pattern. It consists of eight parts:
- Tail – 1;
- Torso – 2;
- Ears – 2;
- Lower abdomen – 2;
- Mane – 1.
The pattern must be printed on plain paper. The size can be varied by decreasing or enlarging the pattern. Let's cut out all the elements along the contour and transfer them to cardboard. Let's trace the cardboard layouts onto felt. Add two small triangles for the middle of the ears. Now we will cut out all the parts from the material in the required quantity. Next we proceed according to the scheme:
- Connect the two lower parts of the abdomen with pins and carefully sew them together. Connect the belly and side elements of the body with the wrong side, matching the outline of the legs. We fix it symmetrically with pins.
- Sew the pieces together using a buttonhole stitch. Let's do the same with the second side.
- It’s easier to stuff the animal’s legs using wire. Wrap it with thread and carefully sort the filler into the toy. When sewing up the elements, we will leave a gap to stuff other parts. If the stuffing is complete, sew up the hole.
- Let's start working on the mane and tail of the toy. Cut out a rectangle of felt, fold it in half and cut it vertically. We leave the middle untouched - about five millimeters. This will be the fringe of the mane.
- To make a beautiful horse made of felt with your own hands, we make the fringe as fluffy as possible. The stripes should be thin. Sew it on and use an overlock stitch.
- We glue the ears on the head with a glue gun and decorate them with small triangles in the middle.
- We will make the eyes from beads. You can take buttons or embroider eyes.
- For the tail, take a small piece of felt and roll it into a cone. We secure it at the base with a couple of stitches, then make a fringe and sew it to the toy.
- The felt horse is ready. All that remains is to decorate the product to your liking.
DIY felt horse toy - patterns, step-by-step guide
crafta.ua
Another way to make an original horse requires the following materials:
- Pink threads;
- Needle;
- Black beads – 2;
- Pink felt;
- Lilac felt.
The product pattern is printed on a printer, transferred to tracing paper and cut out. It consists of ears, legs and body. When transferring to fabric, take into account a seam allowance of three millimeters on pink felt. Lilac material is used for the tail and mane. No allowances required. Progress:
- The two body elements are sewn together. The seam starts from the muzzle of the product. A mane is sewn between the back and front elements.
- The work can be done manually or by machine - the individual choice of the master.
- When the seam reaches the legs, a tail is inserted between the layers, then the back is connected.
- The horse's belly is not sutured.
- Work is carried out on the wrong side. At this stage, the toy turns inside out. It is stuffed with padding polyester, cotton wool or other fillers, then a seam is made on the tummy. Blind stitches are used.
- The ears are sewn on using hidden stitches.
- The eyes are fixed in the form of beads.
It turns out to be a cute DIY felt horse, which will be an excellent gift or home decoration.
Felt horse - master class for beginners
Let's consider the third option for creating a felt toy. Using this master class, you can make a felt rocking horse for a Christmas tree. To do this, she will need to sew a loop to hang on the New Year's tree. Progress:
- Fold the sheet of felt in half to cut out two identical elements.
- For the mane and tail we take a bunch of woolen threads. Cut to the desired length. We tie a thread at one end of the bundle. The tie is located closer to one of the edges. This will be the horse's tail.
- To make the felt horse more beautiful, we will give it bangs.To do this, take a second bundle of thread. We make a tie, as when working with a tail, only a few centimeters further from the base. The toy can be given a specific style. For example, make a mane from small braids or shiny threads.
- Now let's sew the body, sew on the mane and tail. The eyes can be glued on with a glue gun, sewn on with thread or embroidered.
- We embroider the mouth and nose with thread.
- We stuff the craft with padding polyester to give it volume. You can also use cotton wool.
- Not only felt, but also other fabrics are suitable for a saddle. Leather and velvet look good. Cut out a rectangle, trim it and glue it to the finished horse.
The product is completely ready. All that remains is to make a collar from a ribbon, you can hang a bell on it.
 0
0